User Management
RDN utilizes a Role-Based Access Control (RBAC) mechanism to handle Authentication and Authorization.
1. Managing Users and Permissions- RBAC Model:
RDN utilizes a Role-Based Access Control (RBAC) mechanism to handle Authentication and Authorization.
Below are the fundamental components employed in an RBAC model:
User – signifies an individual who has access to an application. Each user possesses a unique username and password, which must be provided for authentication. This is how RDN identifies its identity and determines its permissions.
Permission – Permissions can either grant or deny access to specific actions. RDN defines various permissions, and administrators should acquaint themselves with these definitions to effectively manage access to RDN’s various services.
Role – Roles can be considered collections of permissions distinguished by unique names. Server administrators establish these roles. Permissions assigned to a role effectively delineate the actions a user with that role is authorized to perform.
2. RDN User Management:
2.1 RDN User Management consists of the following:
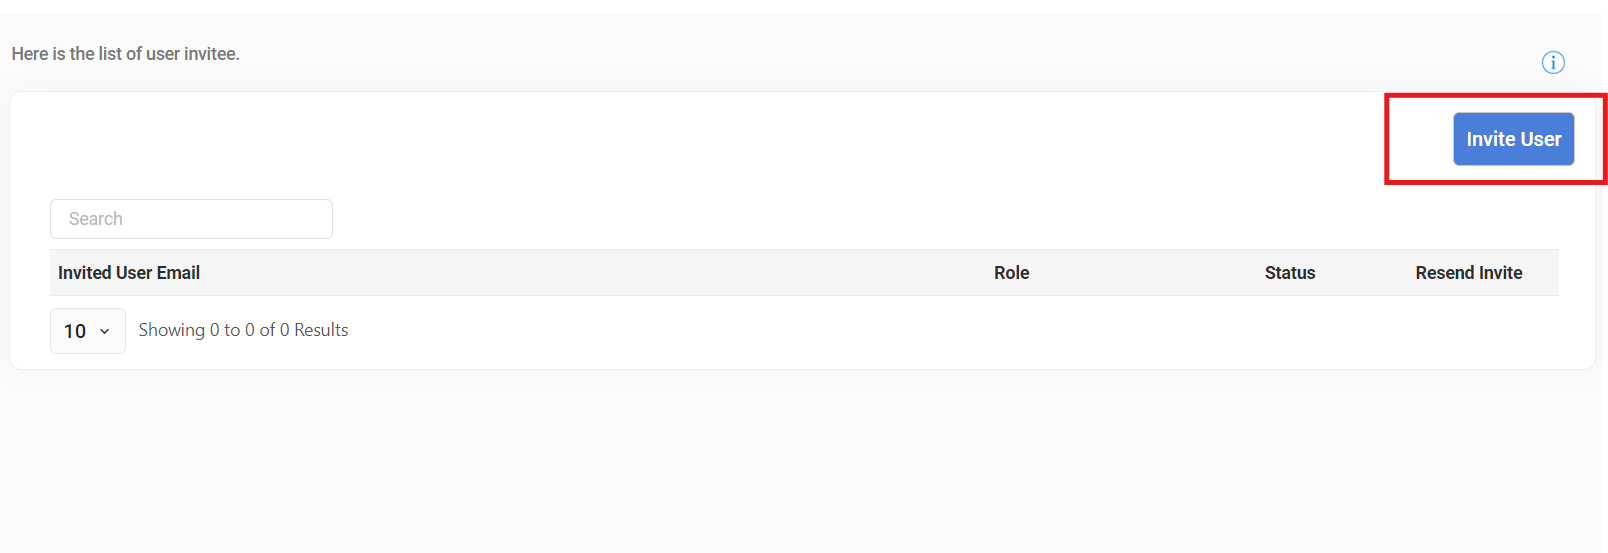
2.1.1 Invite User:
This includes a list of the users with their respective roles and their request status (accepted/declined/ pending). The super admin/ admin can also resend the invitation request for the users whose request status is either declined or pending.
2.1.2 User List:
This includes a list of all the users with their details like role, email address, created date, and created by.
3. RDN User Management Roles and Permissions:
3.1 User Roles:
The following roles have been defined in the RDN User Management:
- User- a user who needs to view all the services in the product but should not be allowed to modify them.
- Developer- a user who has ownership over a product within the application. They will typically be able to read/write all data in the product.
- Admin- An administrator role typically grants a user the ability to assign permissions to other users. Admin cannot change permissions of another admin role.
- Marketing user- who can view all RDN services but can create, and modify only Advanced Services.
- Marketing admin- who can access and modify Advanced Services
- Super admin- who has complete access to all RDN functions including managing billing and managing subscription plans. There can only be one super admin at a time. The Super admin has the authority to grant super admin privileges to another user, and by default, the previous Super admin’s rights will be downgraded to Admin status.
3.2 User Roles and their Permissions:
The following permissions have been assigned to the respective roles in RDN User Management:
User
- View Basic Utility Service
- View Custom Service
- View Categorization Service
- View Multi-Column Lookups
- View Lead to Account Matching Service
- View Advanced Marketing Services
Developer
- View Basic Utility Service
- View and create Custom Service
- View and create Categorization Service
- View and create Multi Column Lookups
- View and create Lead to Account Matching Service
- View Advanced Marketing Services
- Admin
- View User’s List under User Management
- Send invites for new user for the role of Developer and User
- View Basic Utility Service
- View, create, modify, delete Custom service
- View, create, modify, delete Categorization Service
- View, create, modify, delete Multi Column Lookups
- View, create, modify, delete Lead to Account Matching service
- View Advanced Services
Super Admin
- View User’s List under User Management
- Send invites for new user for role of User, Developer, Admin, Marketing user, Marketing admin, and Super admin.
- Manage plan (Upgrade/Downgrade/ Cancel plan)
- Manage Billing (View/ Download invoice/ Update card details)
- View Basic Utility Services
- View, create, modify, delete Custom service
- View, create, modify, delete Categorization Service
- View, create, modify, delete Multi Column Lookups
- View, create, modify, delete Lead to Account Matching service
- View, create, modify, and delete Advanced Services
- View, Create, modify and delete SFDC Connection.
Marketing User
- View Basic Utility Service
- View Custom Service
- View Categorization Service
- View Multi Column Lookups
- View Lead to Account Matching Service
- View, create, modify Advanced Services
Marketing Admin
- View, create, modify and delete Advanced Services
- Send invite for new user for role of Marketing User.
4. Create a New User
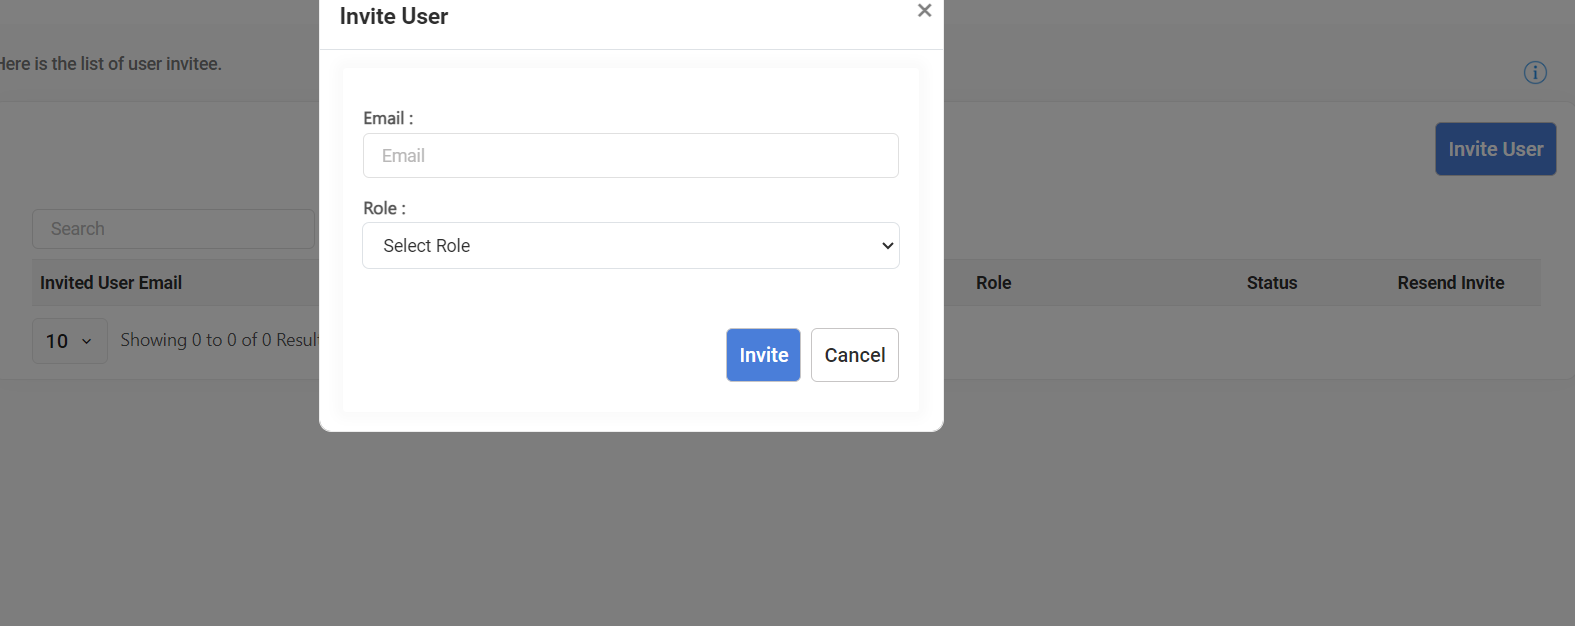
4.1 New users can be added by clicking on the ‘Invite User’ button. Superadmin or admin can send invitation requests to add new users.
4.2 The super admin/ admin will input the email address of the invitee and choose their corresponding role. Click the ‘Invite’ button to send the invitation request.
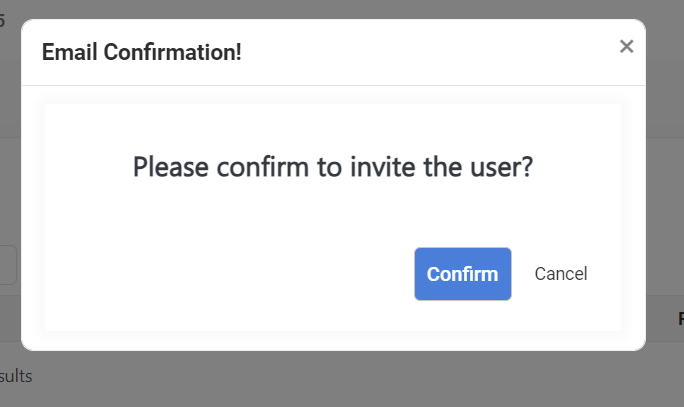
4.3 A confirmation message of the email address is sent before sending the invitation request.
Subsequently, users can access their RDN accounts using their email addresses as usernames and the passwords they initially set. Additionally, the user will receive a welcome email from RDN, which includes their login credentials for accessing the RDN platform.
5. Change Role
To change the user role and permissions:
5.1 Click on the ‘Edit Role’ button corresponding to the user name in the User’s List.

5.2 Select the updated role and click on Save.

5.3 Confirm to update the role.

6. Deactivate User
To deactivate the user from the user’s list:
6.1 Deactivate the user under ‘Active’ column corresponding to the username from the User’s List.
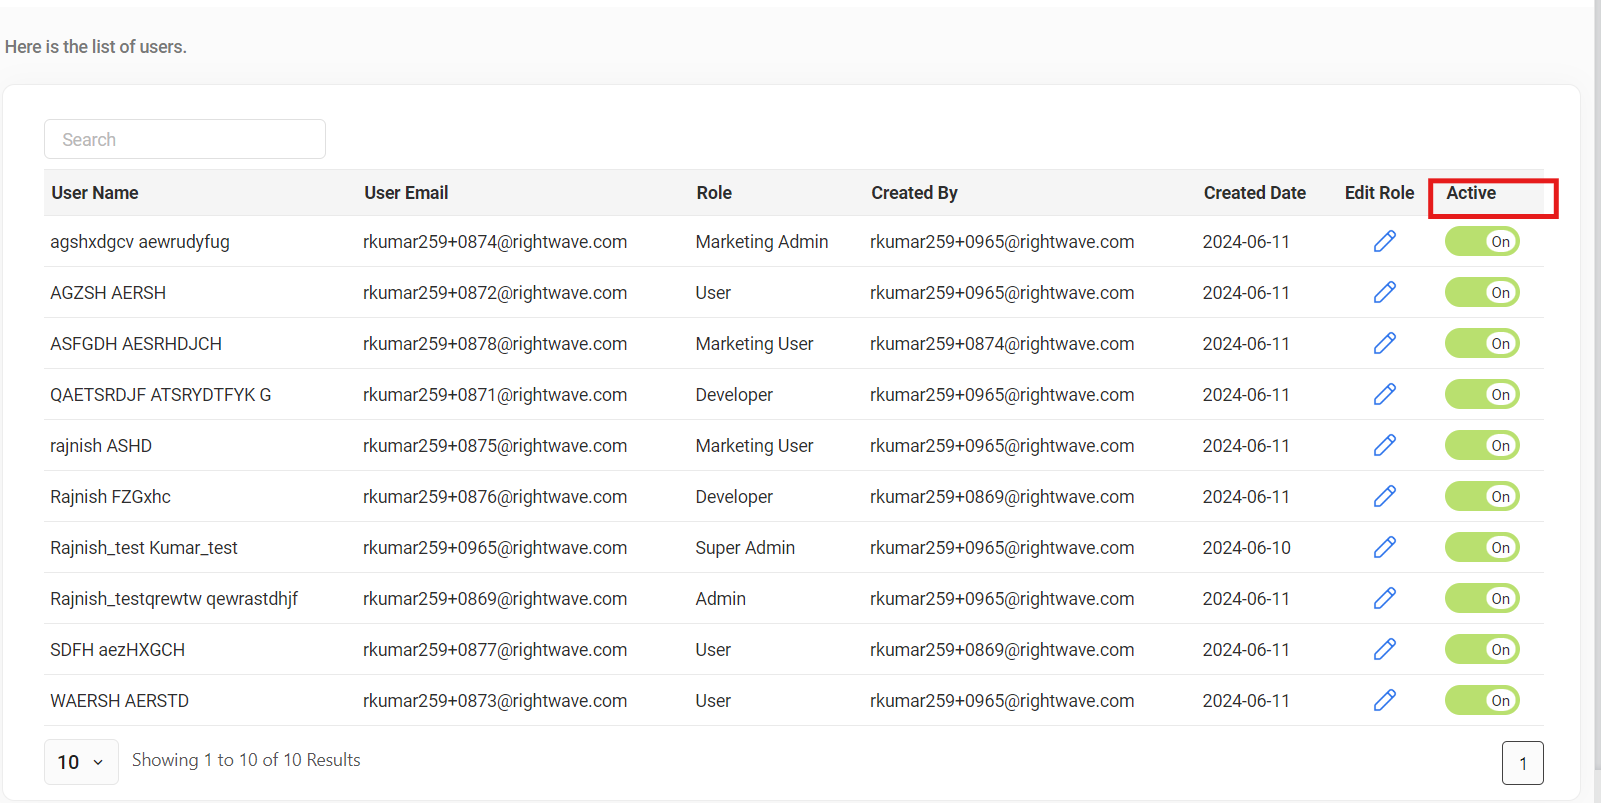
6.2 Click on the ‘Confirm’ button to deactivate the user.

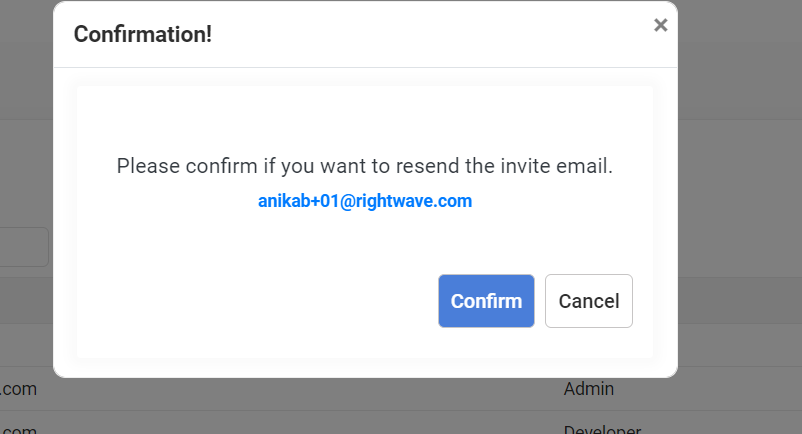
7. Resend Invite
To resend the invitation request from the user’s list:
7.1 To resend the invitation request to users with a “pending” or “rejected” status, the super admin or admin should click on the “Resend” button associated with the user’s name in the User’s List.
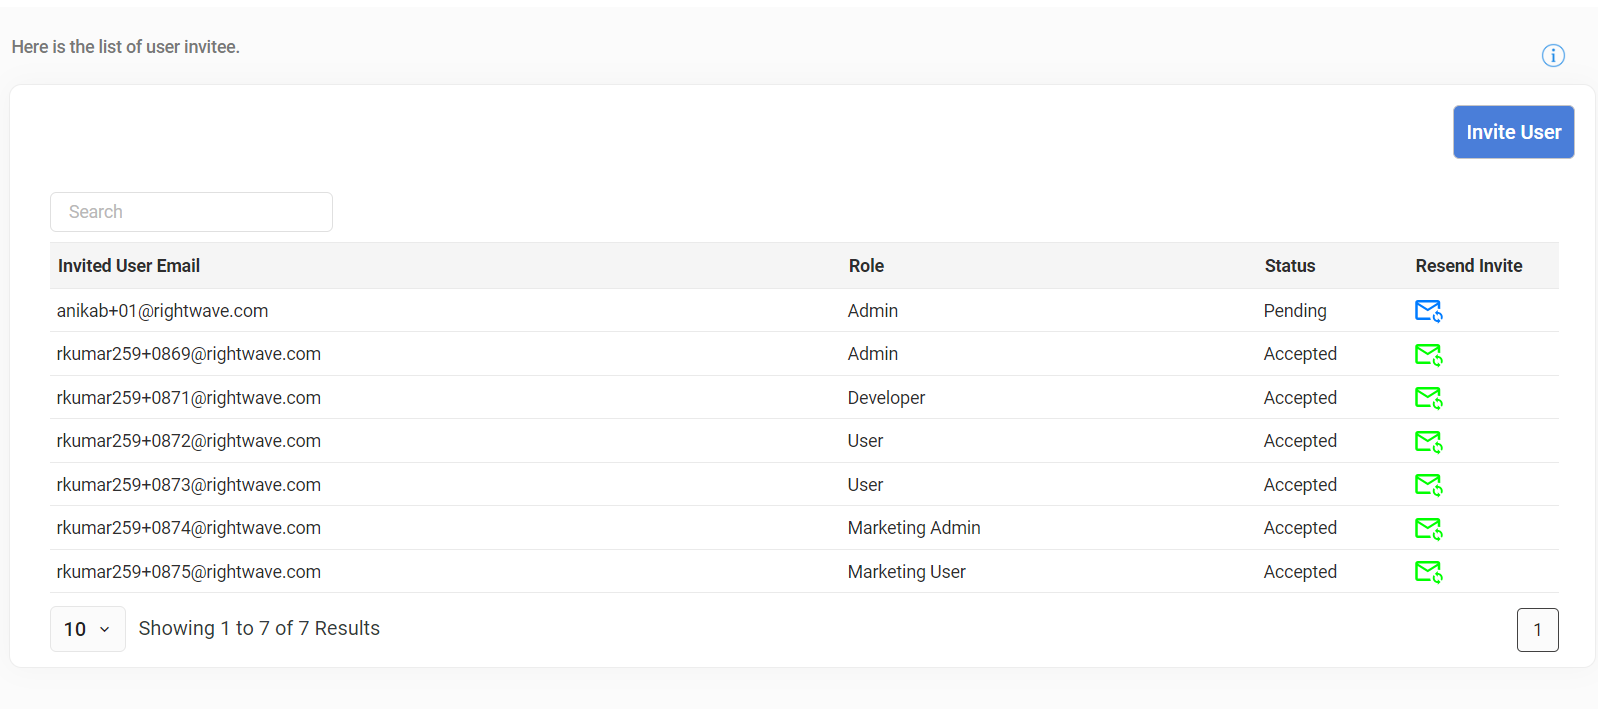
7.2 To resend the invitation request to the new user, click the “Confirm” button.