RDN SFDC Connected App
The Connected App acts as a secure bridge between Salesforce and RDN. By establishing a trusted connection, it allows RDN to access Salesforce's Account data via APIs.
The Salesforce Connected App is required for the Lead-to-Account Matching Service due to the following key reasons:
1. Secure Integration between Salesforce and RDN (RightWave)
- Authentication: The Salesforce Connected App enables secure authentication between Salesforce and RightWave (RDN). When a lead match request is sent, it ensures that the data transmitted between Salesforce and RDN is securely authenticated using OAuth 2.0.
- Authorization: It allows for granular control over the permissions granted, ensuring that the RightWave service has the necessary access to Salesforce data (e.g., Leads, Accounts) without exposing unnecessary data or functions.
2. Accessing Salesforce Data
- The Lead-to-Account Matching Service needs to access Salesforce’s Account data to perform the matching operation. The Connected App facilitates this access, allowing the service to query, compare, and match Leads to Accounts based on the pre-defined Lead-to-Account rules.
3. Seamless Data Flow
- The Connected App acts as a secure bridge between Salesforce and RDN. By establishing a trusted connection, it allows RDN to access Salesforce’s Account data via APIs. This enables RDN to perform the lead-to-account matching process based on Lead-to-Account rules defined within RDN.
4. Support for REST API Calls
- The REST API of the Lead-to-Account Matching Service will use the Salesforce Connected App to make calls securely. The app allows RightWave to communicate with Salesforce’s API endpoints and retrieve necessary data for matching leads to accounts based on defined criteria, ensuring that this process is automated and error-free.
Steps to Create SFDC Connection for Lead-to-Account Matching Service:
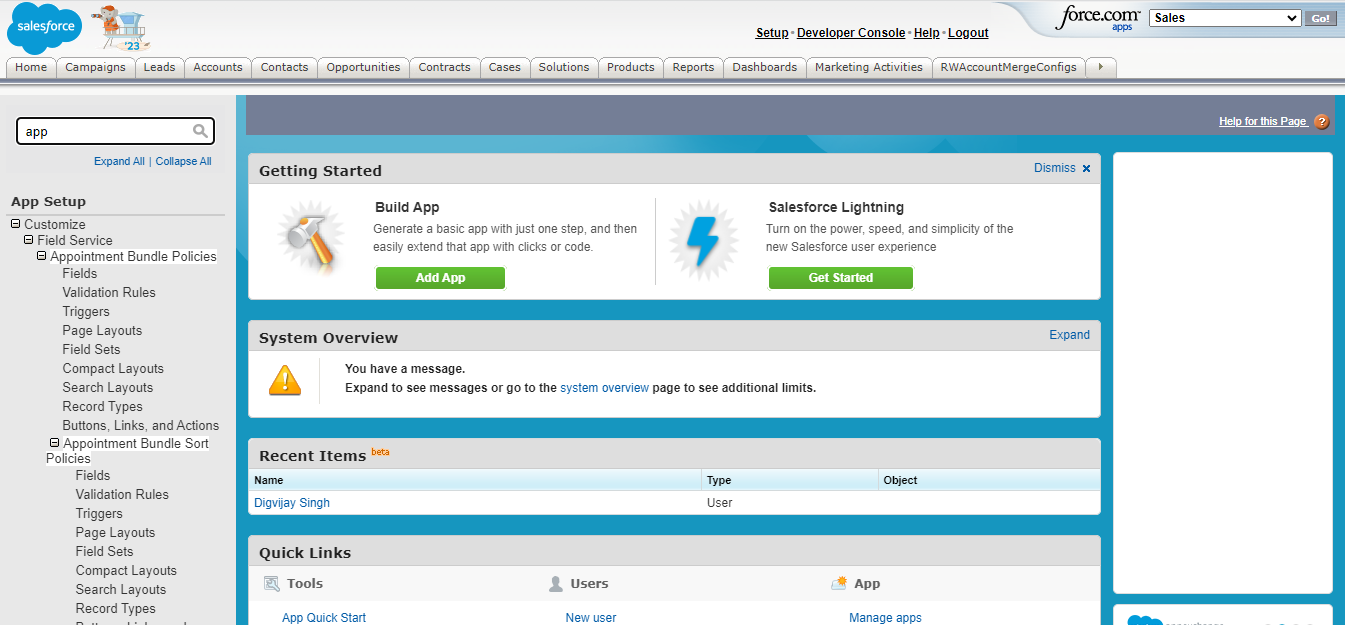
- Log in to your Salesforce account. Then click on the Setup option as shown highlighted in the screenshot below.

2. Search ‘App’ in the left search bar.
3. This will search ‘Apps’ from the setup list.
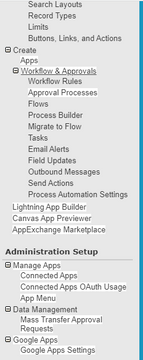
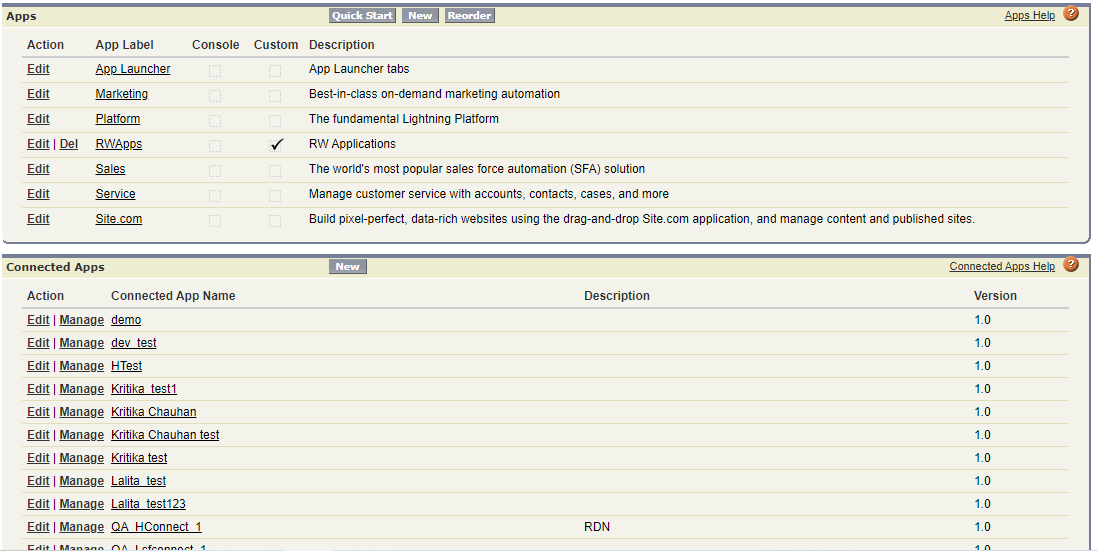
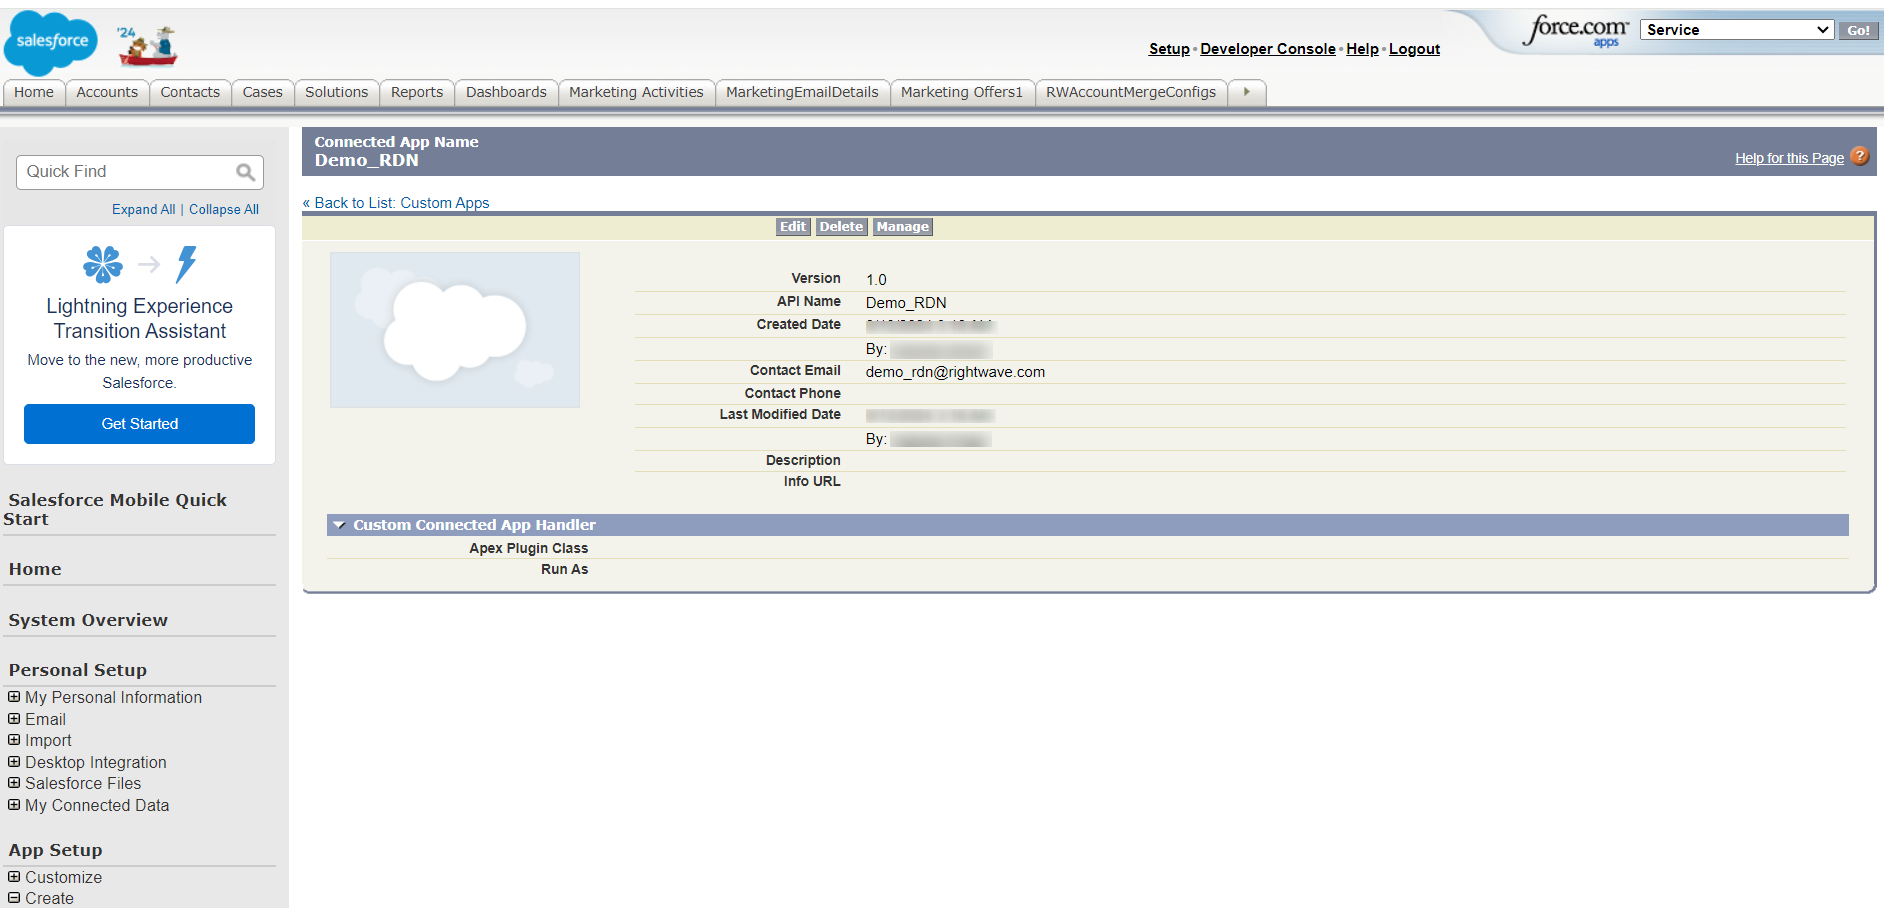
4. This will display the App Label List and Connected App Name list. Click on the ‘New’ button on the Connected Apps List.
5. Enter the details of the Connected App Name, API Name, and contact Email. Click on the ‘Enable OAuth Settings’ checkbox.
In Salesforce (SFDC), OAuth settings refer to the configuration options available for OAuth 2.0 authentication and authorization in connected apps.
When creating or editing a connected app in Salesforce, you can access and configure various OAuth settings that determine how the app authenticates and interacts with Salesforce APIs and resources.

6. Enter the Callback URL.
Set the Callback URL to: https://rdn.rightwave.com/wh/ltam/sfdccallback?org=649591022260d4a8f8b443e1
The callback URL serves as an endpoint or a webhook that Salesforce can use to send notifications or data to your system in real-time. It allows your application to receive and process information from Salesforce asynchronously.
For example, if you are integrating a third-party application with Salesforce, you may need to provide a callback URL during the integration setup. When a specific event, like a record update or creation, occurs in Salesforce, Salesforce will send a notification to the specified callback URL with relevant details about the event. Your application can then process this information and take appropriate actions based on the received data.
7. Paste the Callback URL in the Callback URL field in SFDC as shown in the screenshot below.

8. Select ‘Manage User Data via APIs (api)’ and ‘Perform requests at any time (refresh_token, offline_access’) from the Available OAuth Scpes list. Click on the ‘Add’ arrow button to move into ‘Selected OAuth Scopes’.
(Do not uncheck the checkbox- ‘Require Secret for Web Server Flow’ and ‘Require Secret for Refresh Token Flow’.)
9. Click on the ‘Save’ button. Click on the ‘Continue’ button.

10. User details will be displayed as shown below. Click on ‘Manage Consumer Details’ to get the ‘Consumer Key’ and ‘Consumer Secret Key’.
11. Enter OTP on your registered mobile number to get the ‘Consumer Key’ and ‘Consumer Secret Key’ as shown in the below screenshot.

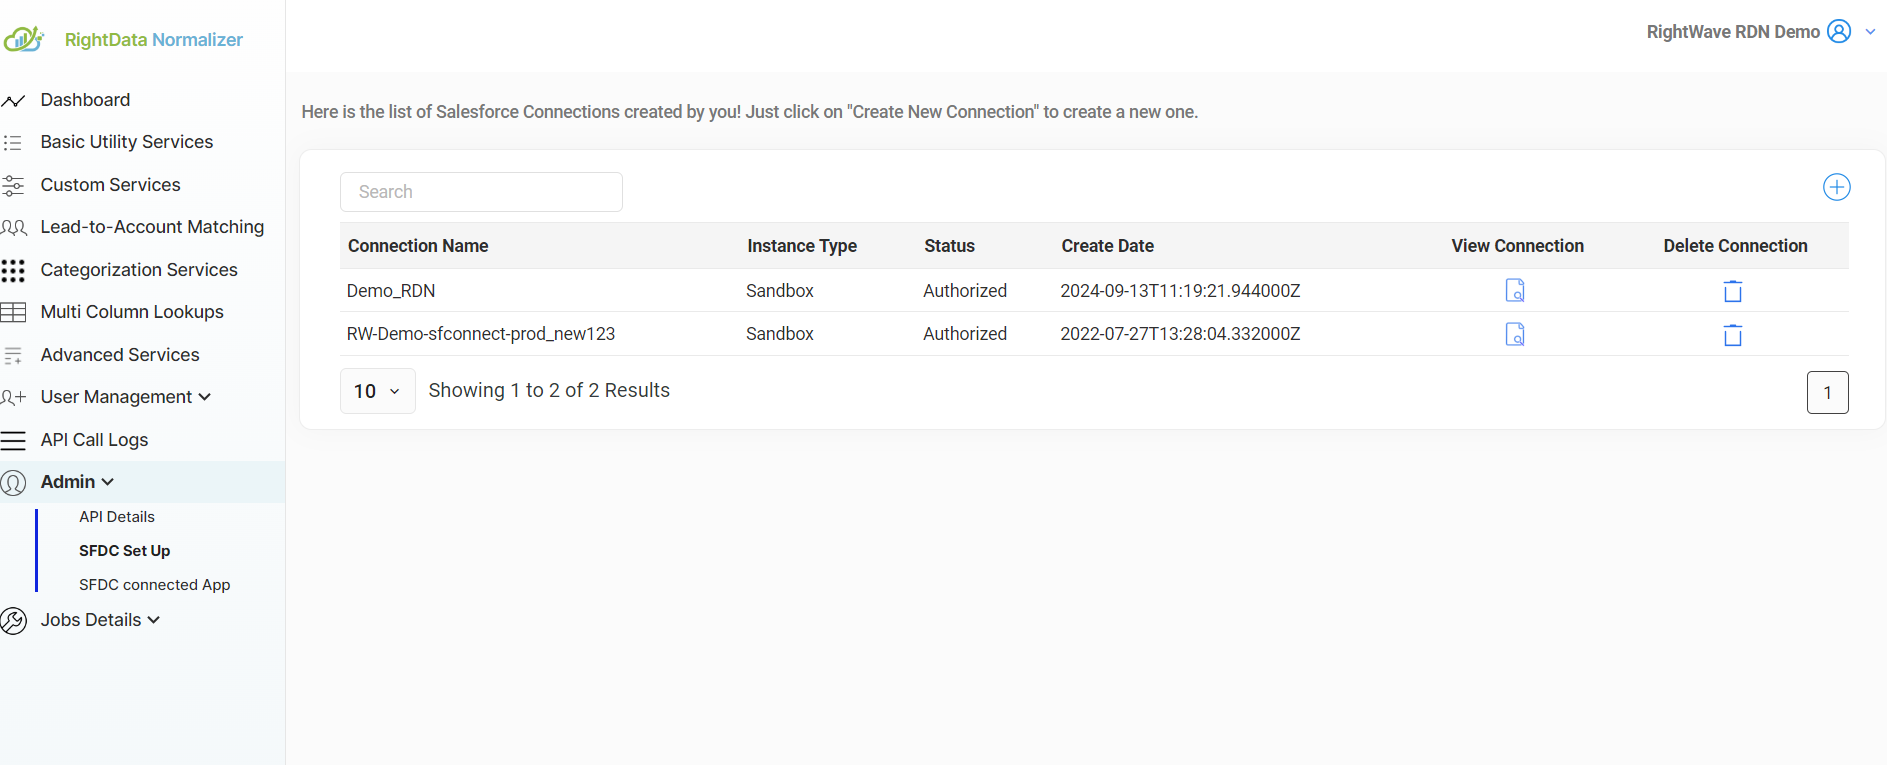
12. Under SFDC Setup in the Admin module, click on the ‘+ ‘ icon to create a new connection.
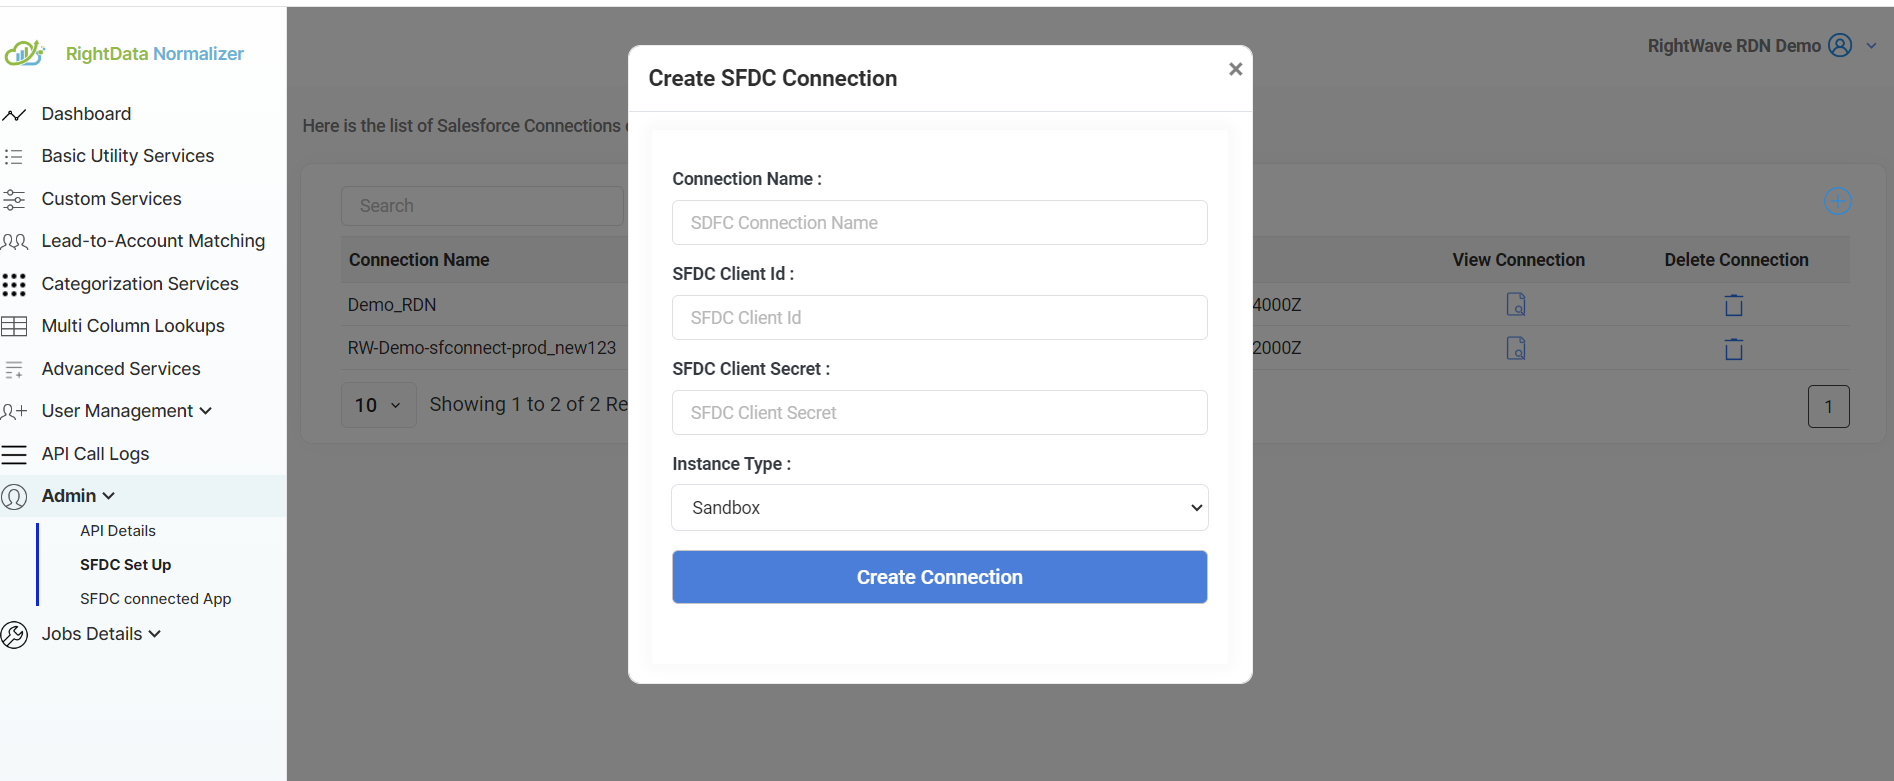
13. Enter SFDC details; Connection Name, SFDC Client Id ( Consumer Key from SFDC), SFDC Client Secret (Consumer Secret Key from SFDC), choose Instance Type, and click Create Connection.
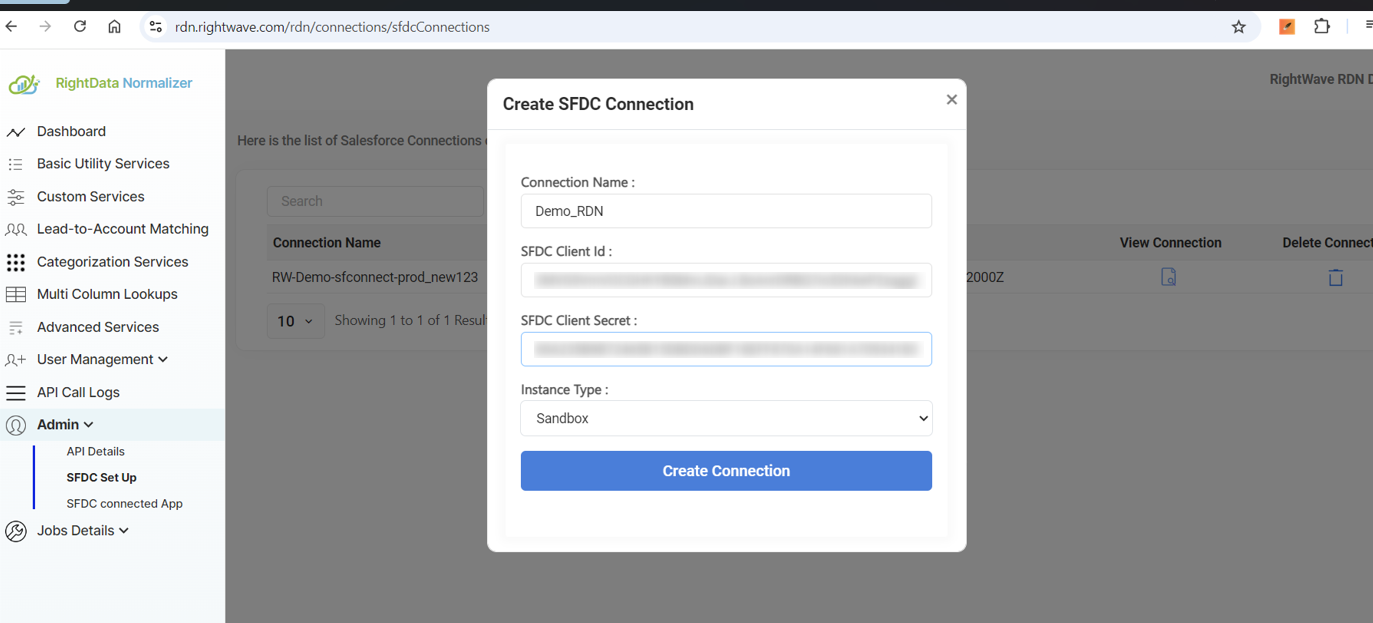
14. SFDC Connection will be created as shown below.