Manage Counter API for Event Registration Control
In numerous events, accommodating an unlimited number of attendees can create significant logistical challenges. The Manage Counter API allows users to cap the number of registrations for each event, ensuring that the event does not exceed its registration limit. Additionally, it provides the ability to display a dynamic message on the landing page (using Ajax) when the registration limit is reached.
How to Use the Manage Counter API
Follow the steps below to create and configure the Manage Counter service:
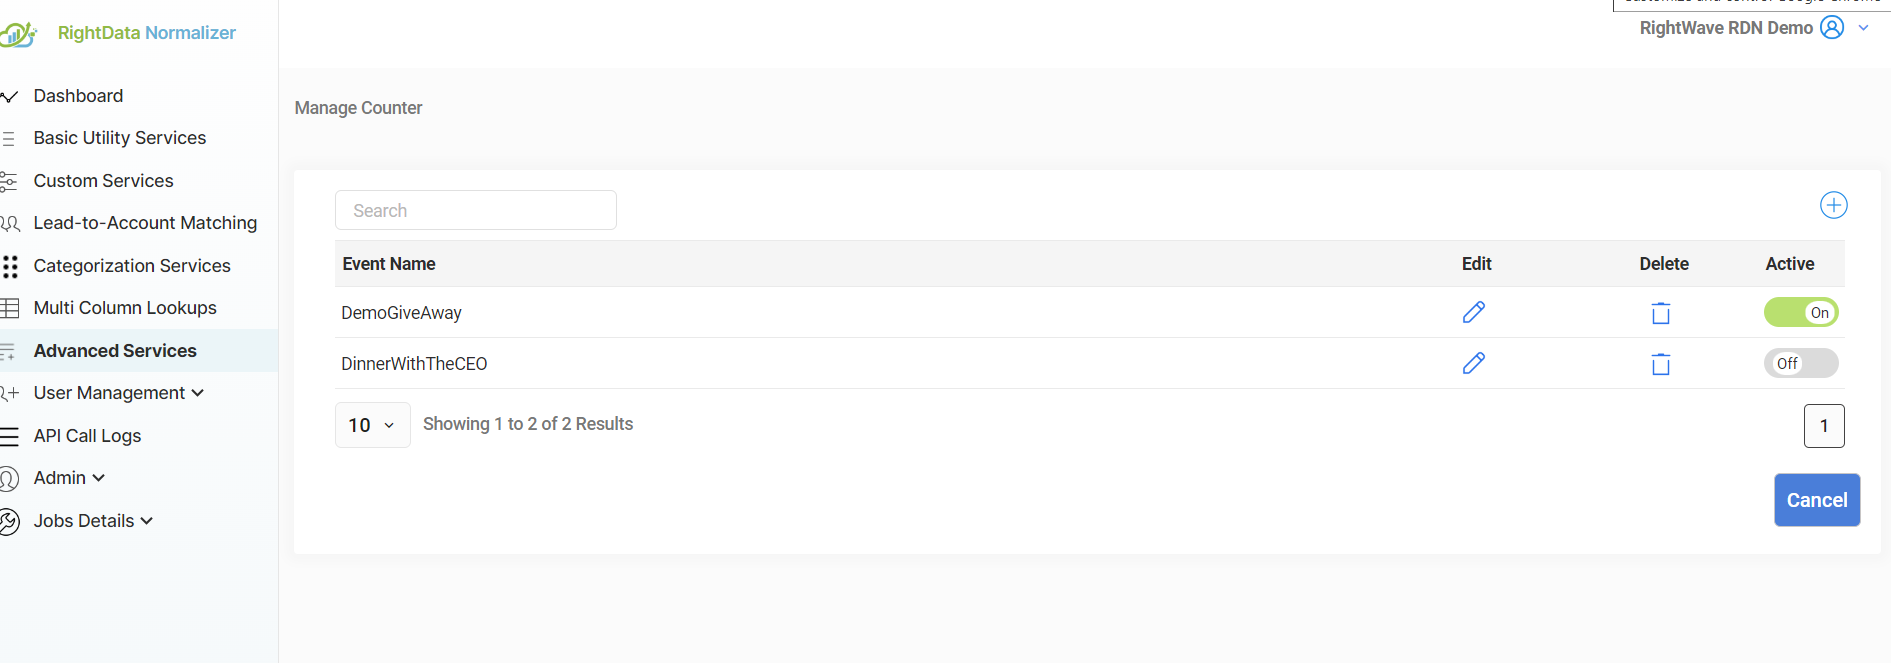
Step 1: Access the Manage Counter Service
- Click on Manage Service.
- Then click the ‘+’ button to create a new Manage Counter service.
Step 2: Enter Event Details
Provide the following information for the event:
- Event Name: Name of the event (e.g., “DemoGiveAway”).
- Current Count: The starting point for the registration count. For example, if you wish the counter to begin at 23, enter 23 as the current count.
- Maximum Count: The maximum number of registrations allowed for the event. For instance, if you want a limit of 30 registrations, enter 30 as the maximum count.
- Message When Maximum Count Reaches: A message that will be displayed once the registration limit is reached (e.g., “No more seats are available”).
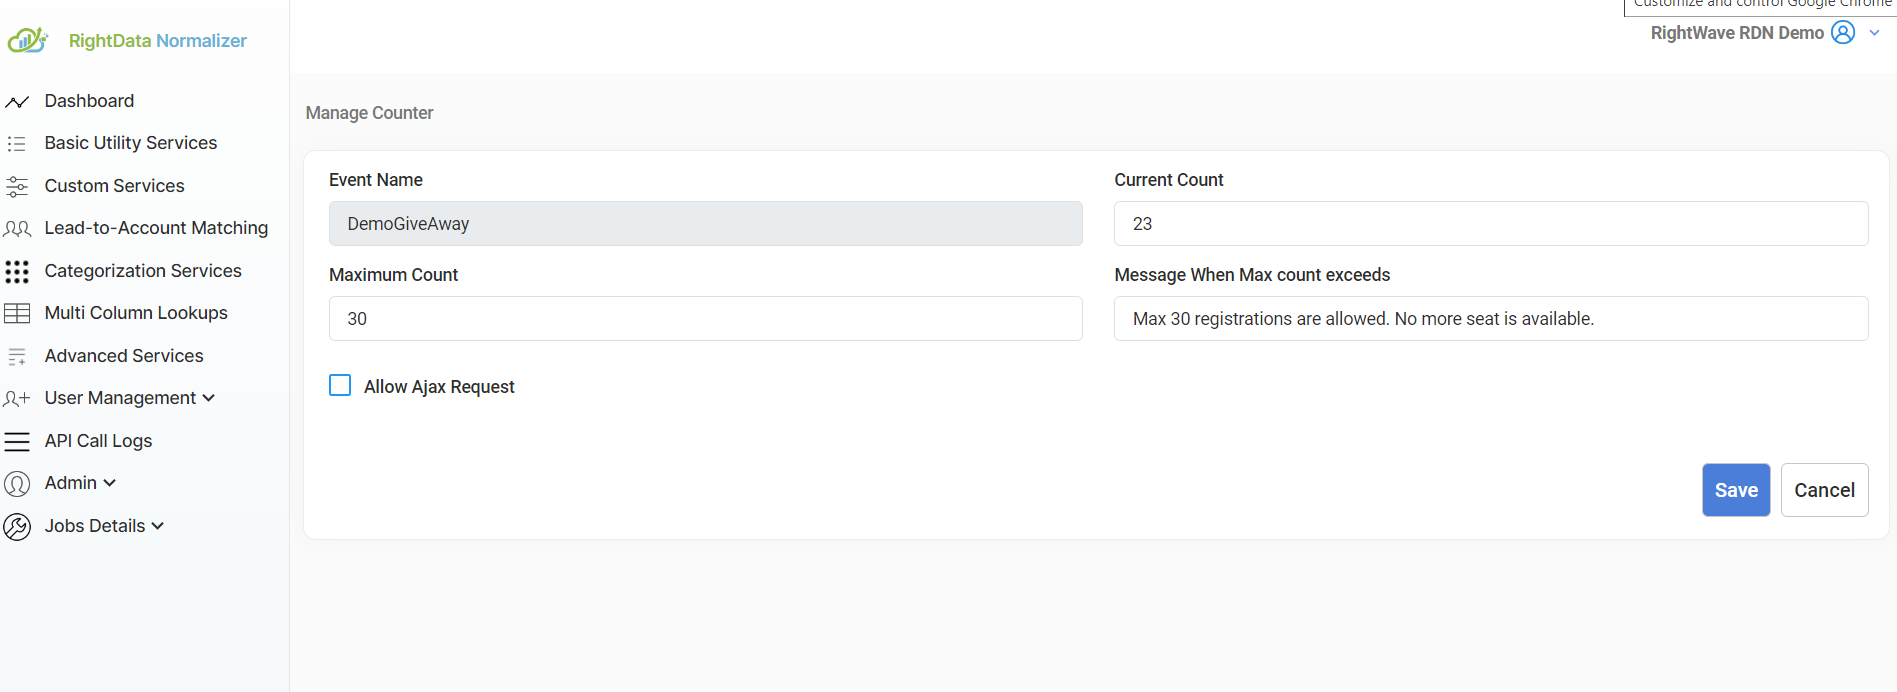
Step 3: Enable Ajax Request
- Check the Allow Ajax Request checkbox. This allows the API to be used in an Ajax call, enabling dynamic interactions on the landing page (such as showing a message when the registration limit is met).
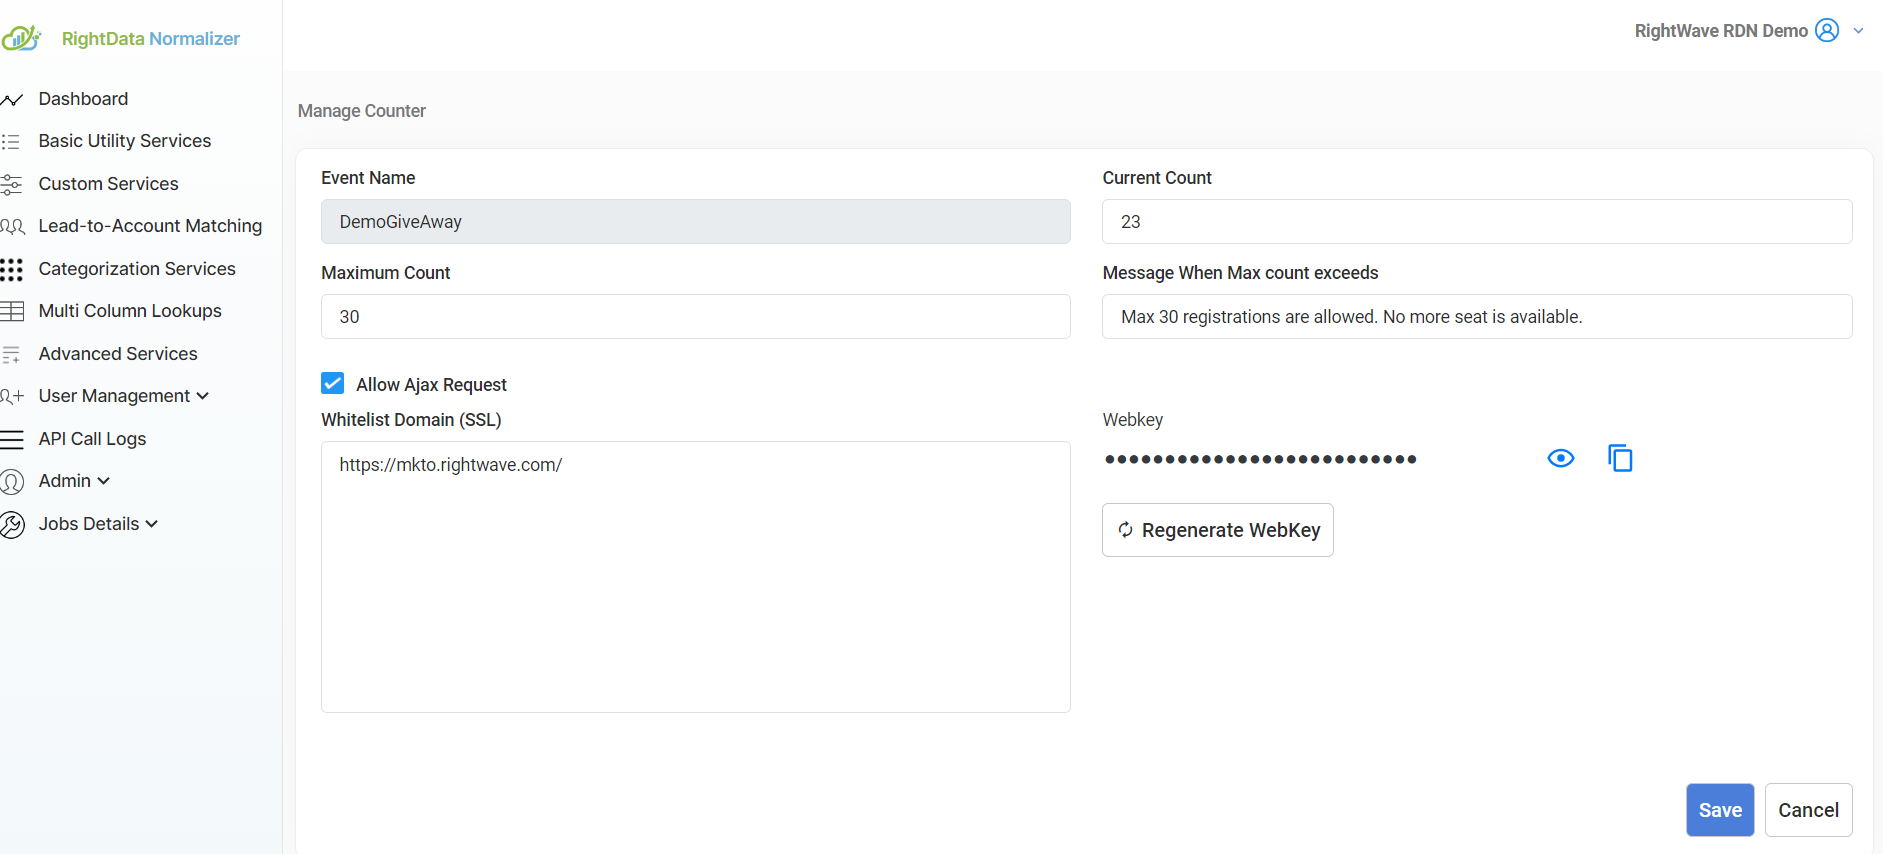
Step 4: Domain Whitelisting and WebKey
- If you plan to use the API within an Ajax call, whitelist the domains that will be making the Ajax requests. This security measure ensures that only authorized domains can access the API.
- You will also need a WebKey to authenticate the Ajax requests. Ensure the WebKey is included in your Ajax call for proper authorization.
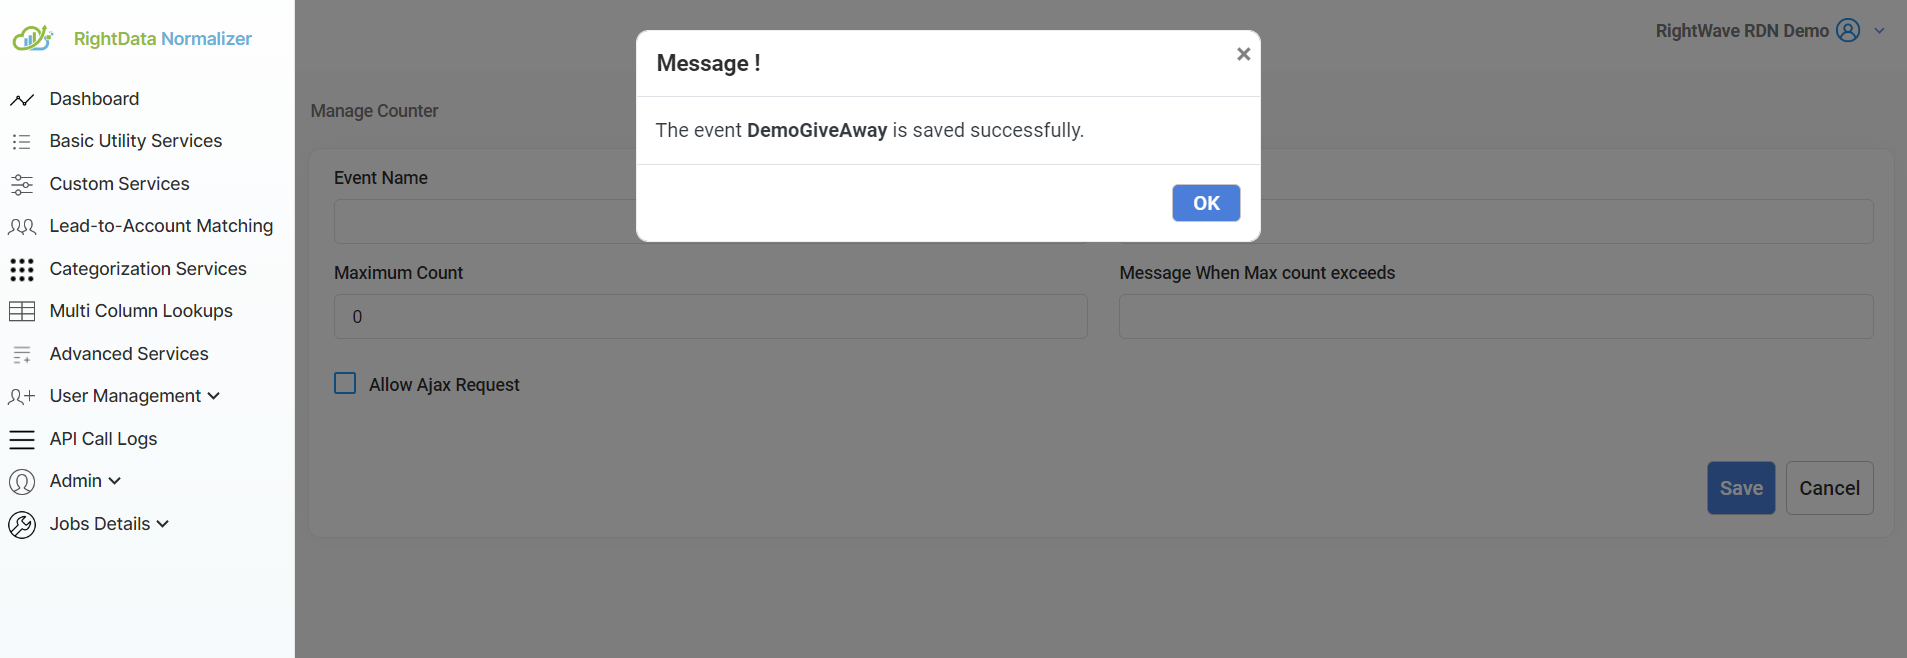
Step 5: Save and Activate the Service
- After entering the necessary details, click Save.
- Then, Activate the Service to start using the API.
Step 6: API URL and Webhook URL
The Manage Counter API provides the following URL to track and manage event registration counts:
API URL: https://api.rw001.com/rdn/api/adv/manageCounter
Webhook URL Example: https://api.rw001.com/rdn/api/adv/manageCounter?event={Marketo token for event}&act={Marketo token for act}&num={Marketo token for num}
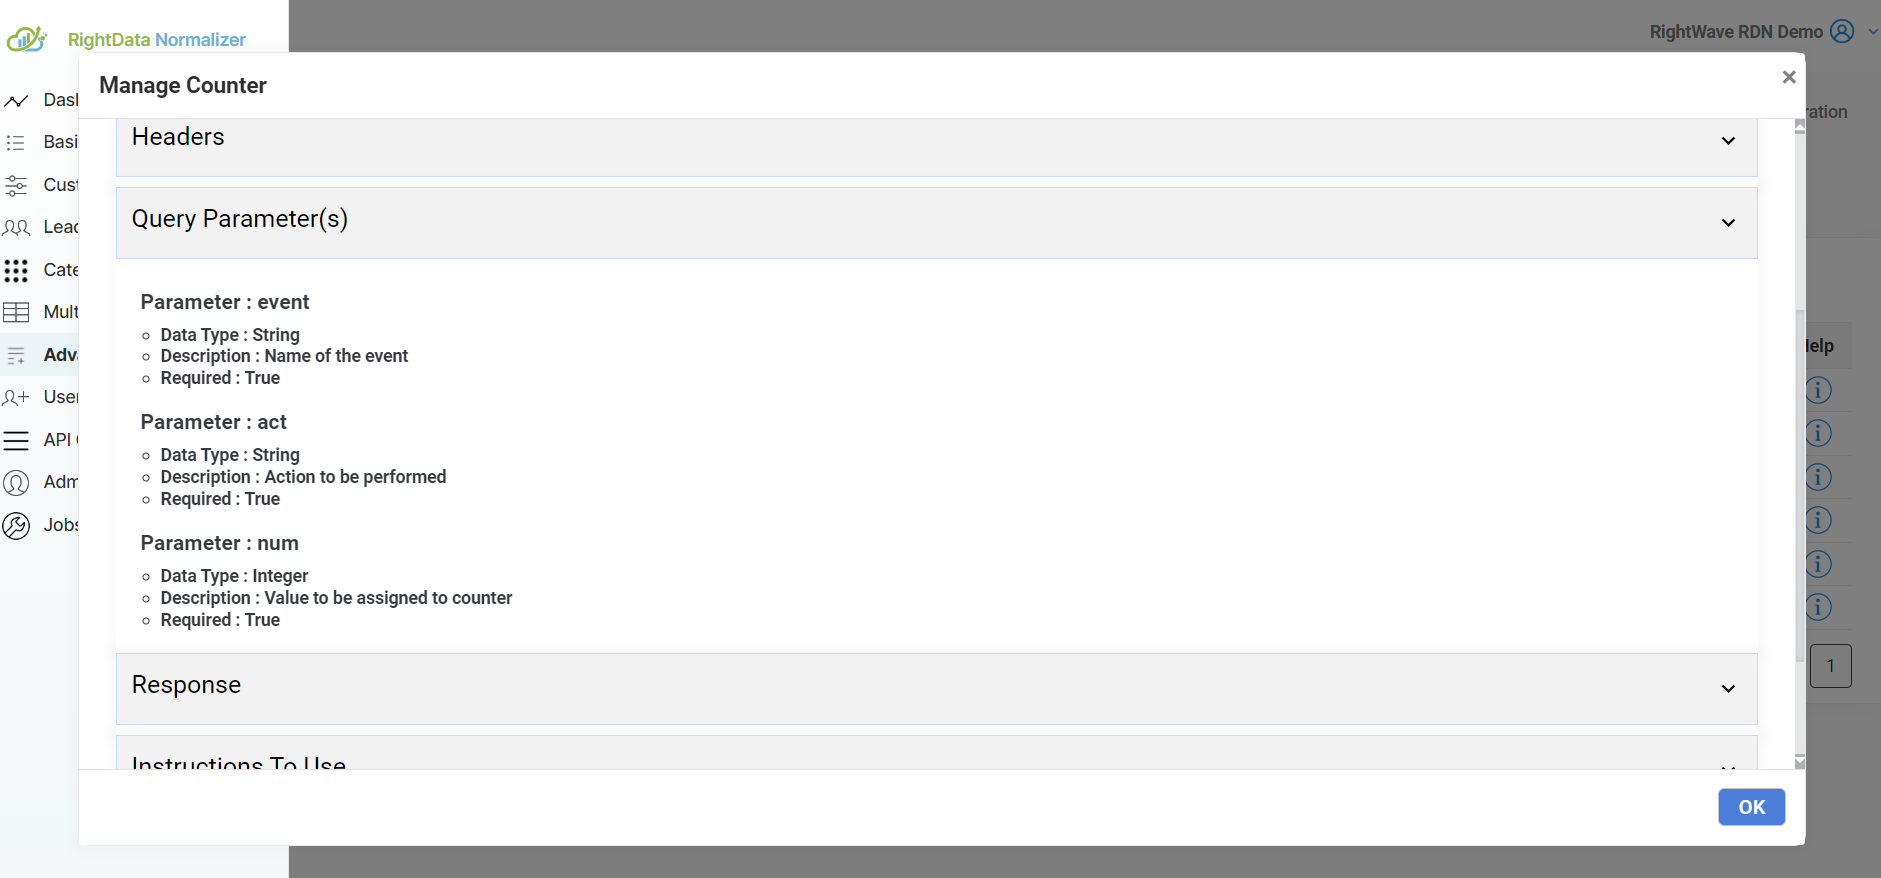
Query Parameters
- Event: The name of the event (e.g., “DemoGiveAway”).
- Num: The current count of registrations.
- Act: The action to be executed, which can have one of four possible values (typically used to check or increment the count).
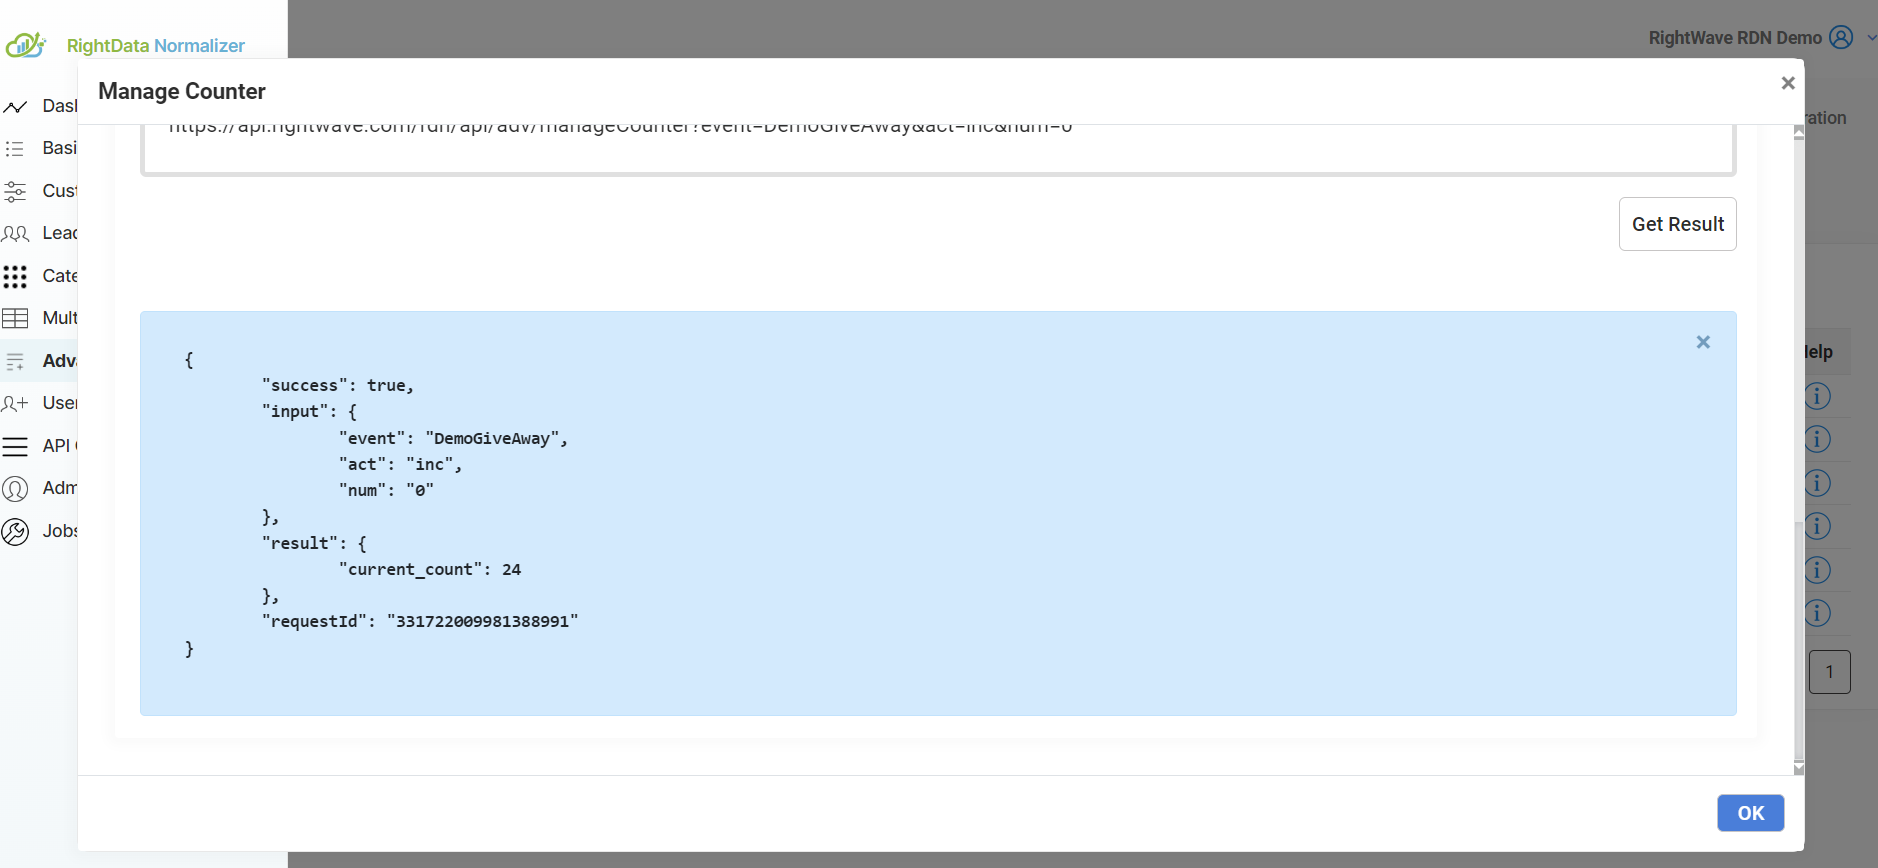
Output JSON Example:
When the API call is successful, the output will return a message in the following format:
{“message”: “<message value>”}

The message will correspond to the information regarding the event’s registration status (e.g., “Registration full” or “Registration is still open”).
Step 7: Test the Service
Once the service is activated, click on the Show Live Testcase button to test the configuration.
- Enter the Event Name: Use the event name you previously configured.
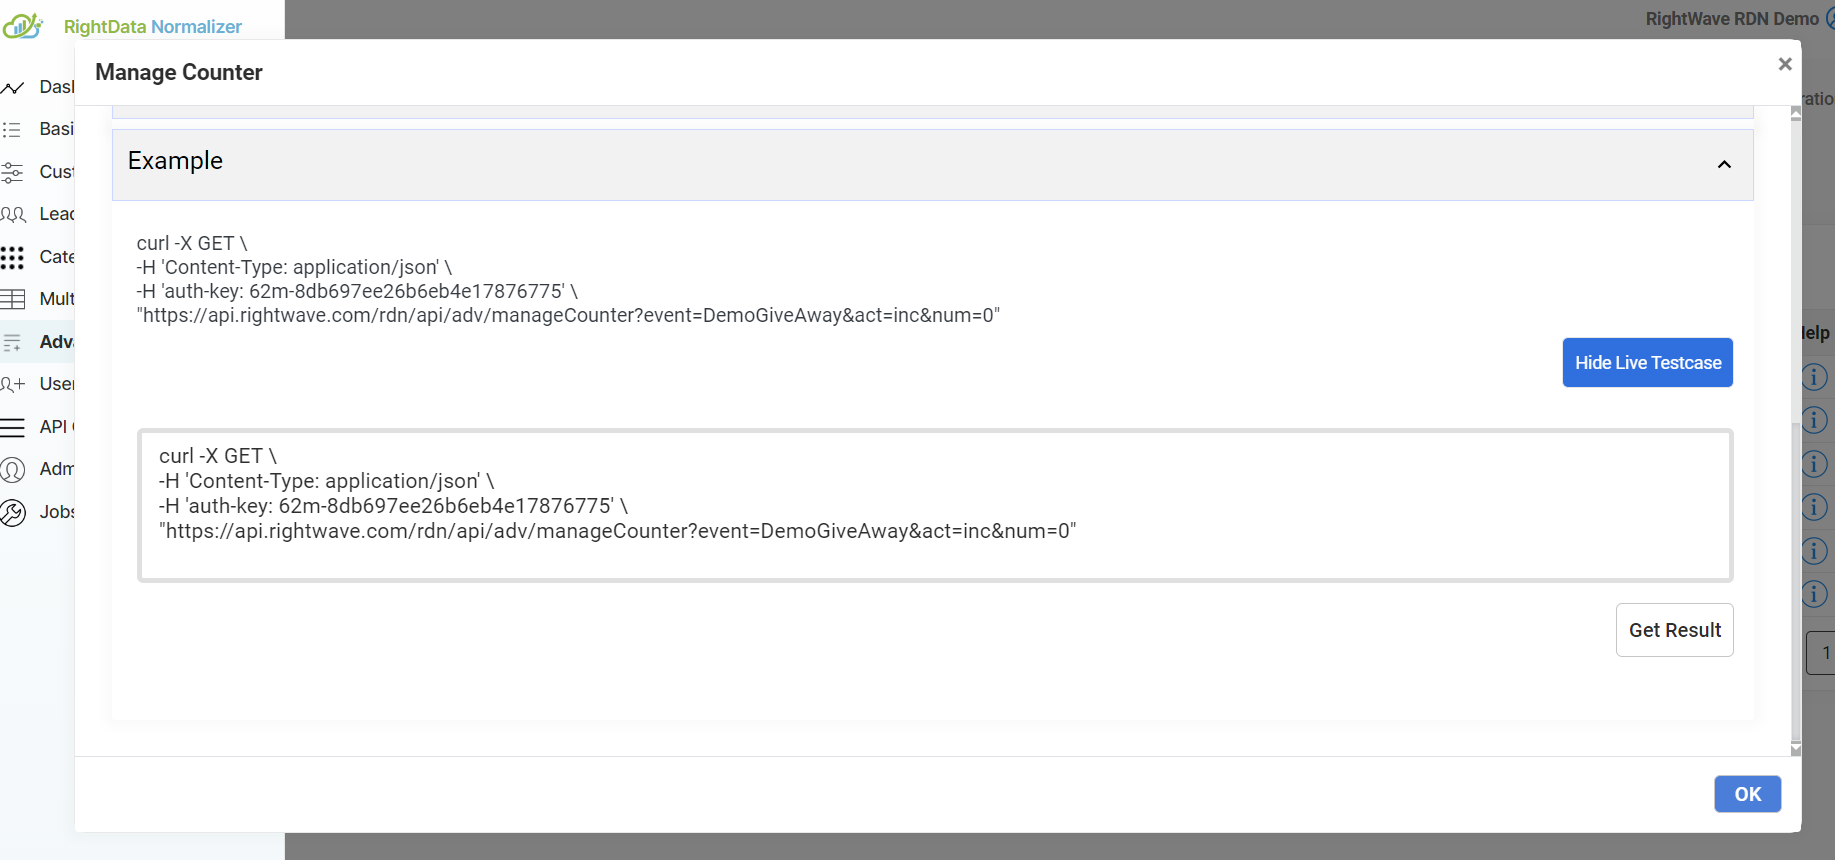
- Click on Get Result to see the response from the API. The response will include the current status of the registration count and whether the maximum limit has been reached.
Step 8: Implement the API in an Ajax Call (Optional)
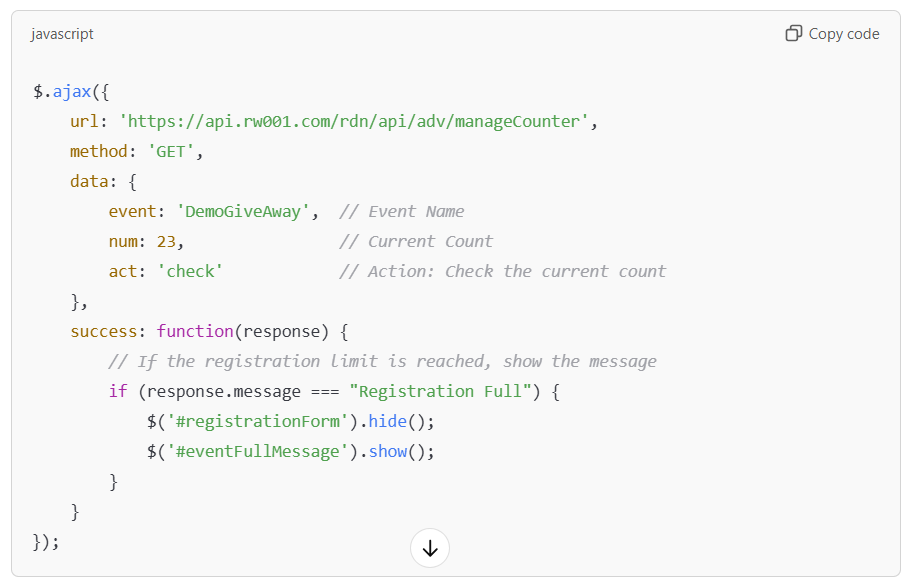
To dynamically update your landing page based on the registration count, you can integrate the Manage Counter API into an Ajax call.
For example, an Ajax request could look like this:
$.ajax({
url: ‘https://api.rw001.com/rdn/api/adv/manageCounter’,
method: ‘GET’,
data: {
event: ‘DemoGiveAway’, // Event Name
num: 23, // Current Count
act: ‘check’ // Action: Check the current count
},
success: function(response) {
// If the registration limit is reached, show the message
if (response.message === “Registration Full”) {
$(‘#registrationForm’).hide();
$(‘#eventFullMessage’).show();
}
}
});
- Dynamic Message: This allows the landing page to update in real time, hiding the registration form and displaying a message when the event is full.
Steps to configure service Manage Counter in Marketo:
Please note that the request parameters values (in step 2) and Marketo Fields (in step 4) are just for example. You have to enter the values as per your service requirement.
1. Go to Admin and click Webhooks. Click New Webhook.
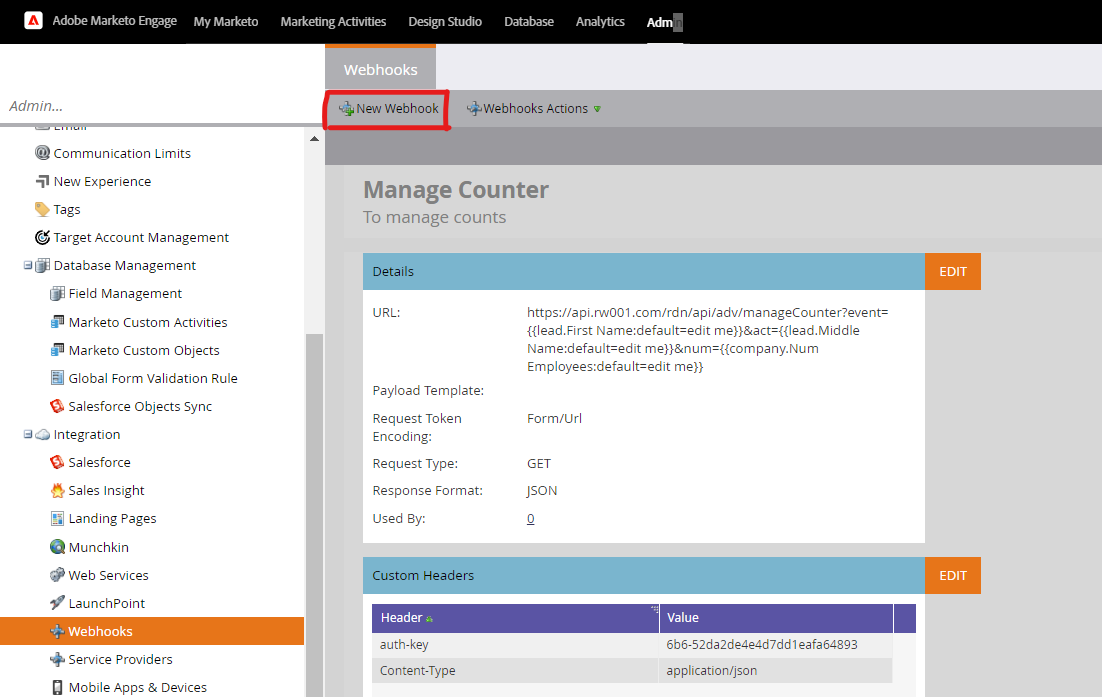
2. Name and configure the webhook for the Manage Counter service.

Webhook Name: Enter the name of the webhook. In the above example, the Webhook name is the same as the service name i.e. Manage Counter. Webhook name can be provided as per requirement.
URL: The URL of the Manage Counter service. The URL has domain and query parameters that will remain the same. You just have to change the parameter values with Marketo Token.
To insert a token, click Insert Token.
Template: It will remain blank.
Request Token Encoding: It will remain None in case of POST, in case of GET field it will be uneditable.
Response type: Select the response format as JSON.
Request Type: The Request Type will remain the same (i.e.) GET as given in the example.
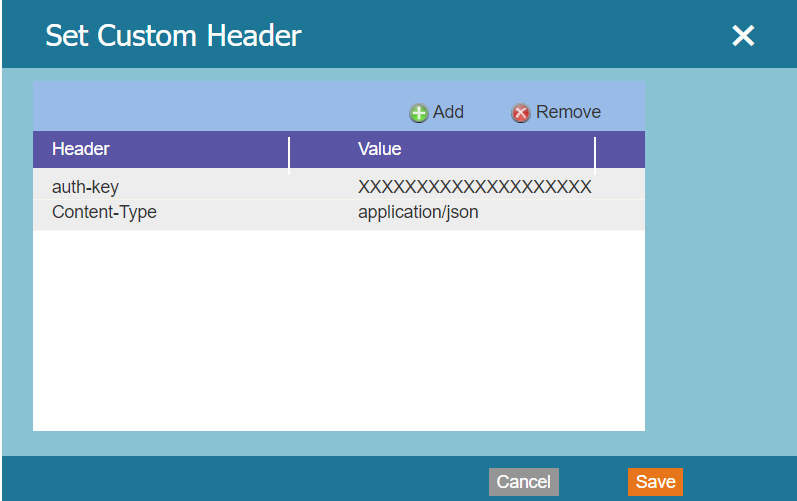
- Add Authentication Header.
Please note that the auth-key shown above is the original auth-key. So, the same value of auth-key and Content-Type should be used while configuring Webhook as shown.
- Response Mappings: Response Mappings are created via a pairing of a Response Attribute. The Response Attribute depends on the output you are returning from the Custom Service JavaScript function. It is recommended to return JSON from Custom Service so that you can easily map it with the Marketo field.

Use Cases:
- Event Registration Limitations: Ensure that the event does not exceed the maximum number of attendees.
- Real-time User Feedback: Display a message on the landing page or form if the event reaches its registration limit.
- Efficient Event Management: Helps to control and streamline the registration process for large-scale events.
By using the Manage Counter API, you gain control over your event registrations, ensuring that the process is both efficient and user-friendly. The integration of dynamic messaging helps attendees stay informed, enhancing their experience and preventing overbooking.