The Promo Code Lookup service provides Promo Codes one by one to the user from the list of Promo Codes. You can upload the list of Promo Codes either manually or via importing a CSV file.
To use the Promo Code Lookup service, please follow the below instructions :
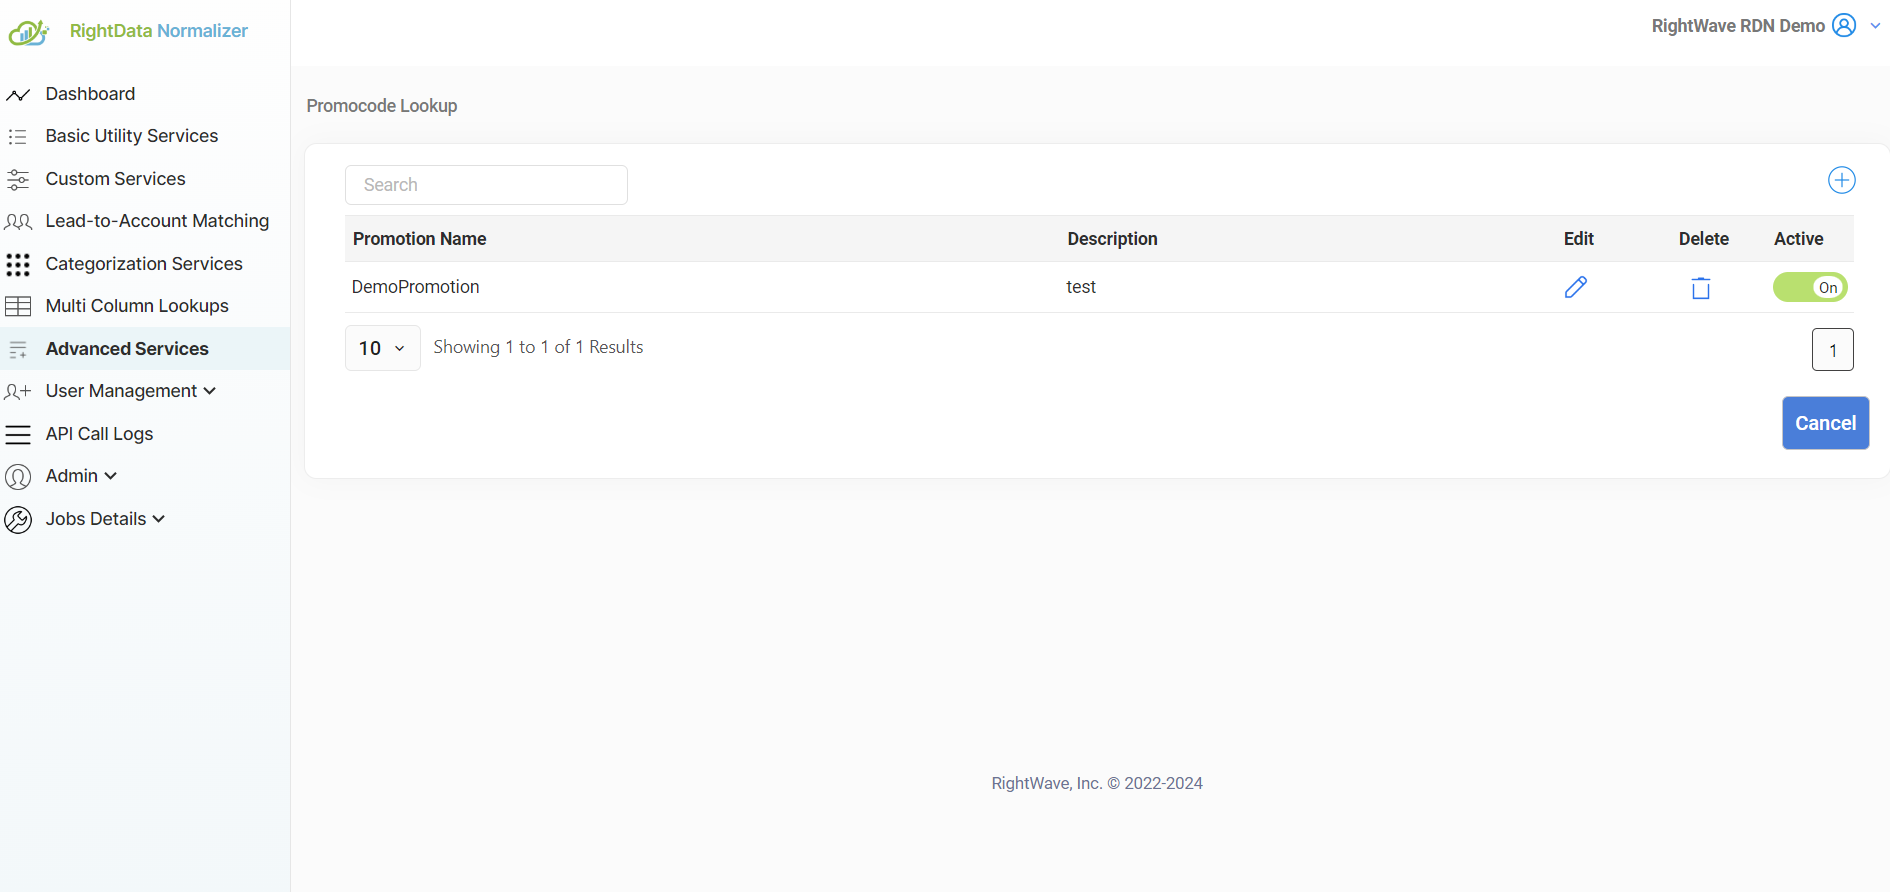
1. Click on the Manage Service button corresponding to the ‘Add Promo Code’ Service.

2. After that click ‘+’ icon to create a new Promo Code Lookup.
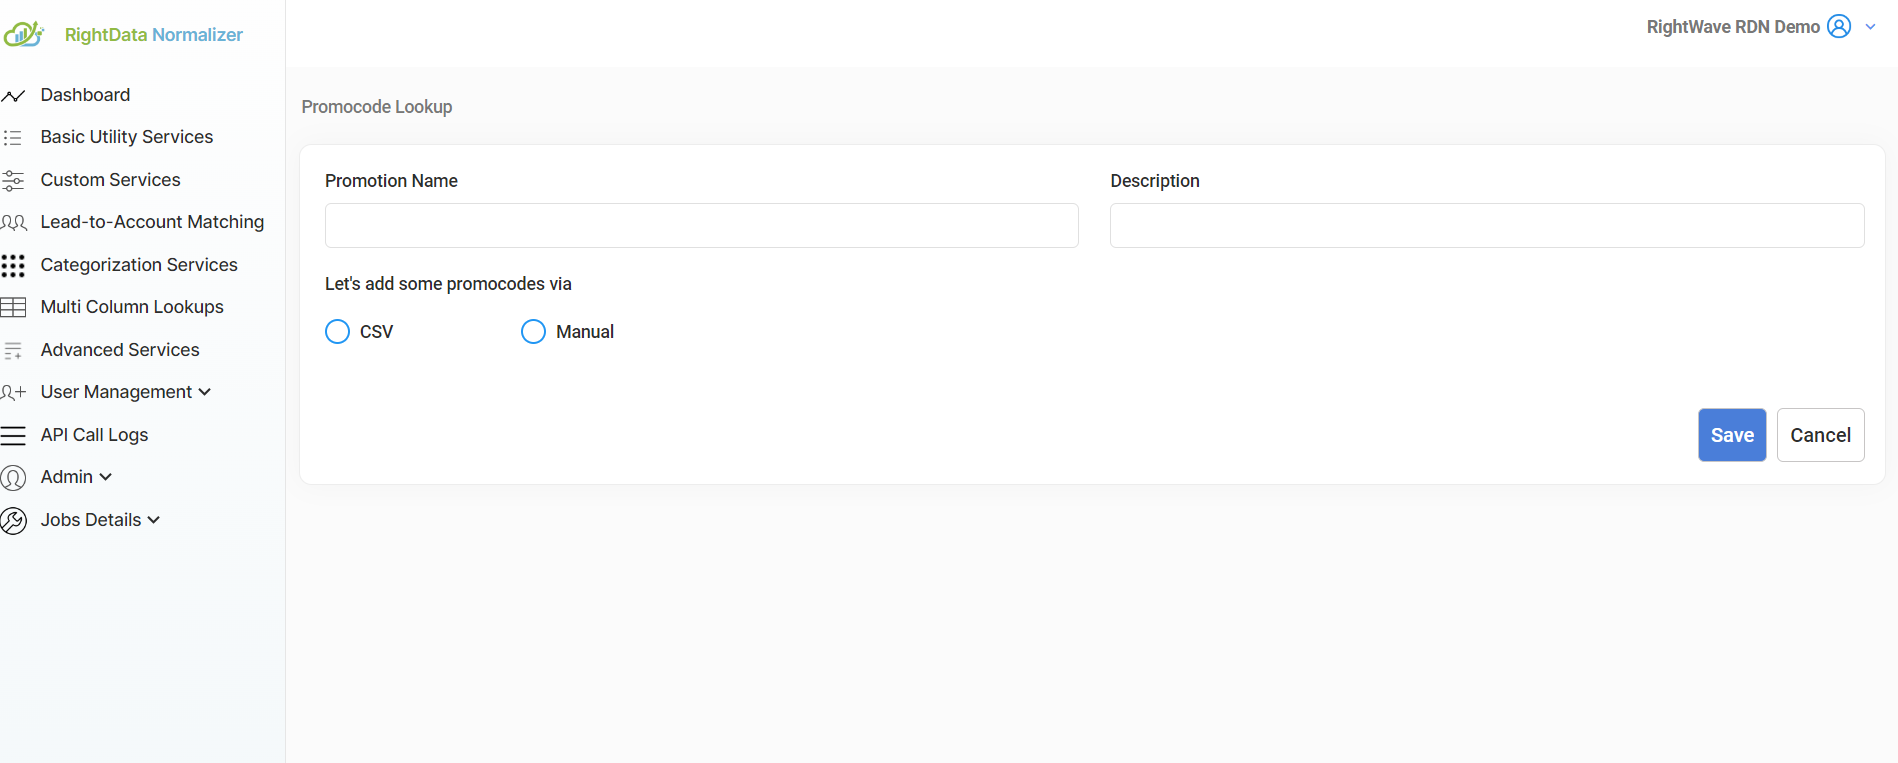
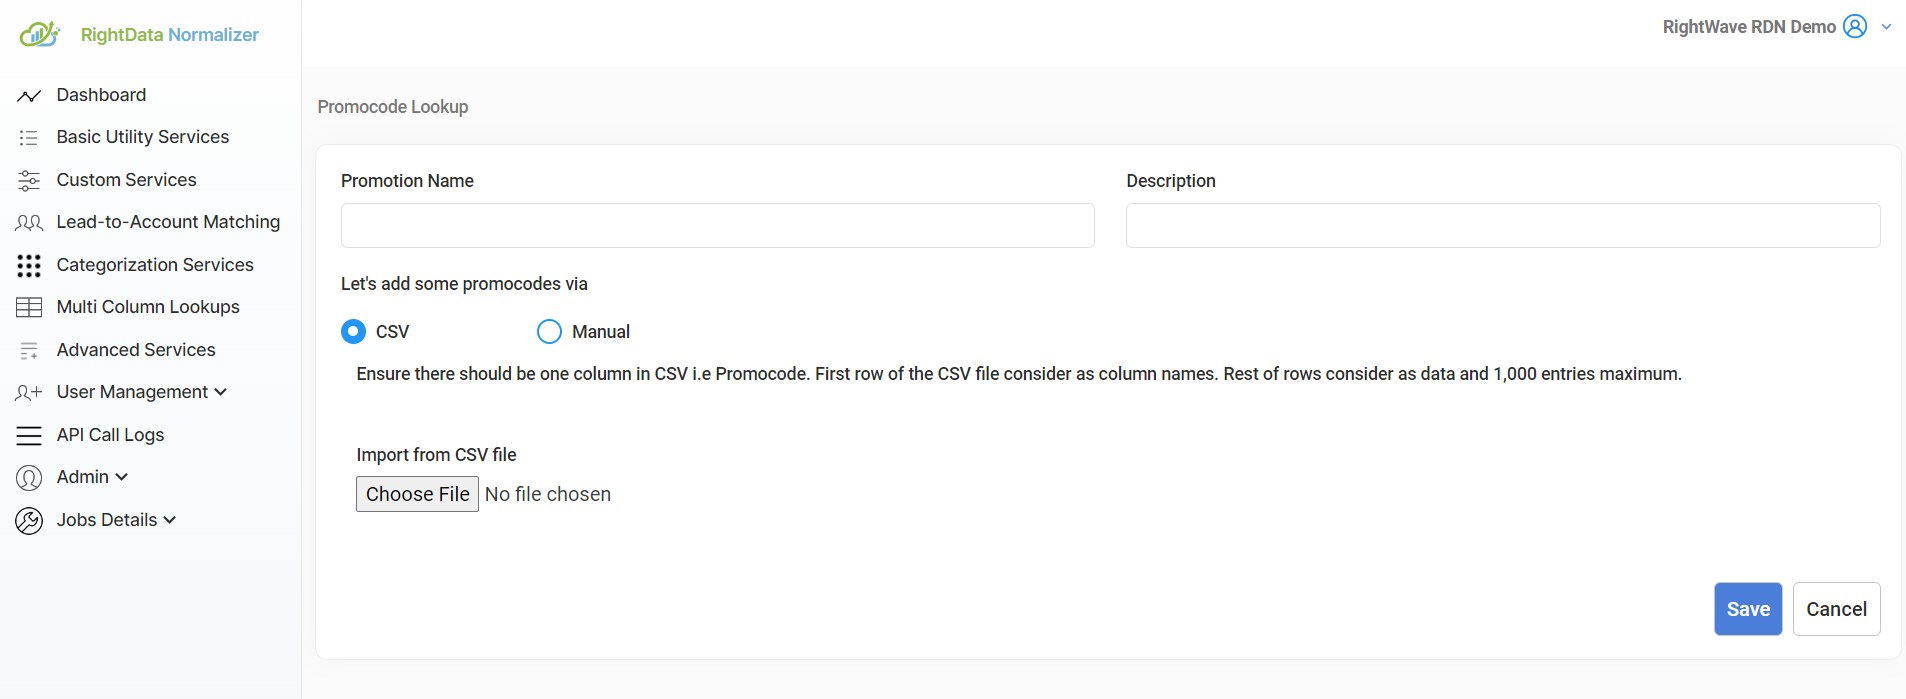
3. Enter the Promotion Name and Description.
There are two options to add Promo Codes in Promo Code Lookup:
- CSV- It can be used in case of a large amount of Promo Code. Maximum 1000 Promo Codes can be added to the Promo Code Lookup.
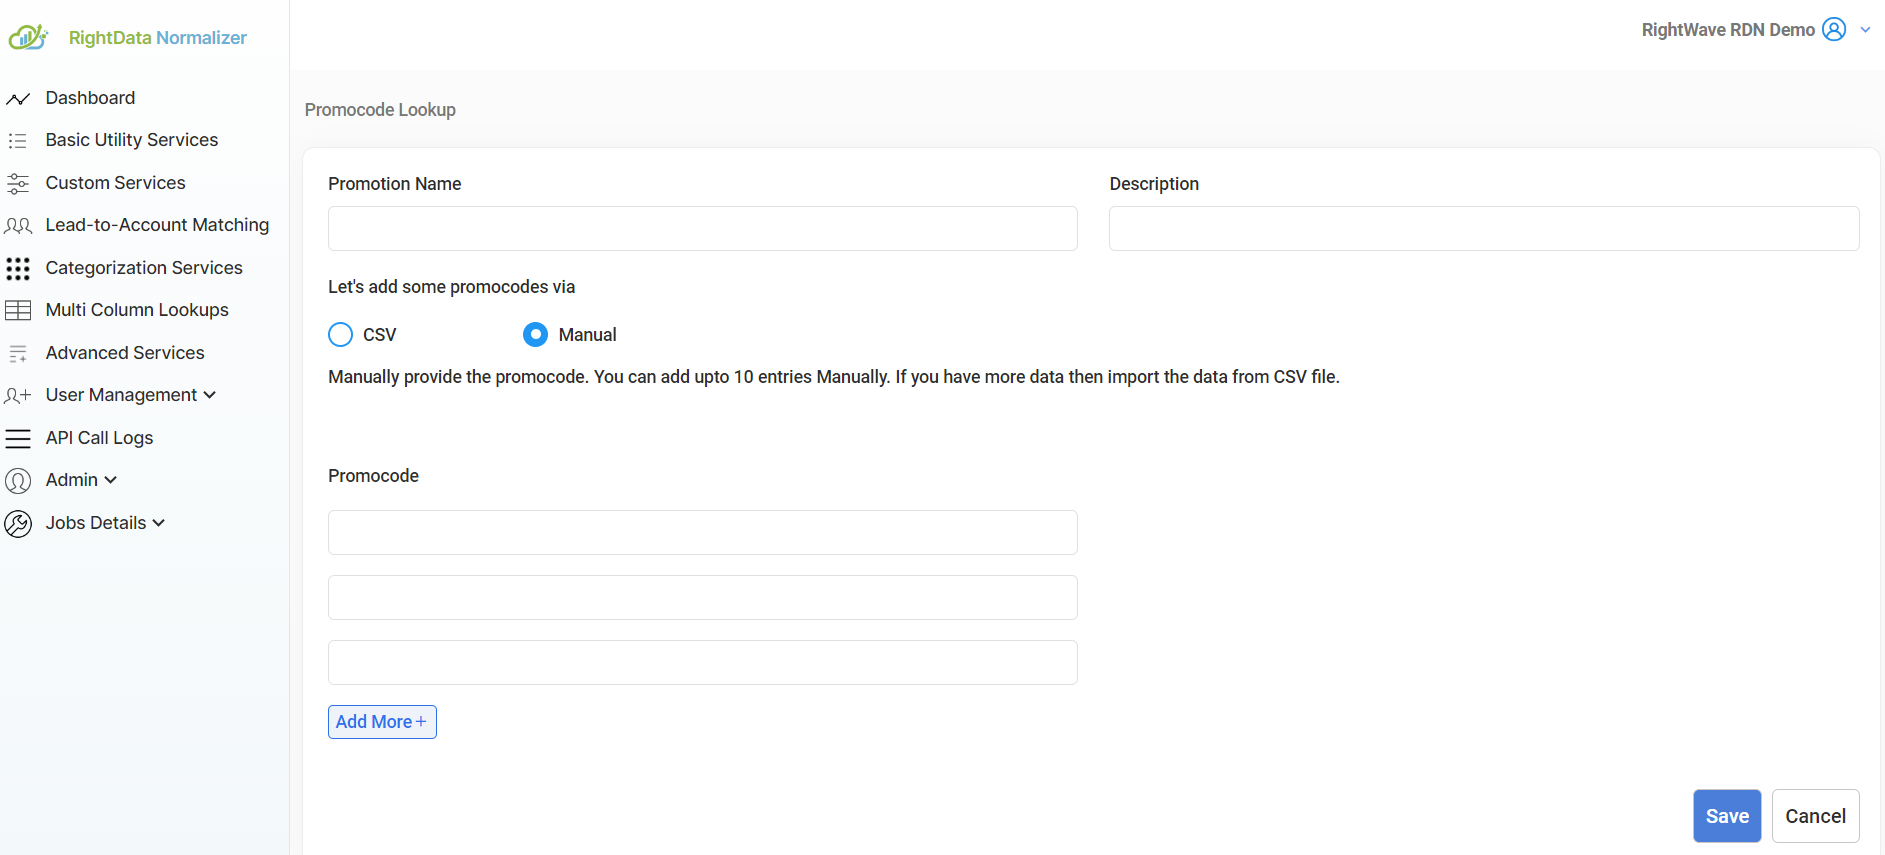
- Manual- It can be used in case of a few Promo Codes to add.
4. Enter the Promo Code manually for up to 10 entries. If you have more data, import the data from a CSV file.
5. There should be only one column in CSV i.e. Promo Code. The first row of the CSV file is considered as a column name and the remaining rows are considered as data and 1,000 entries maximum including the header.
6. Duplicate Promo Codes will be discarded.
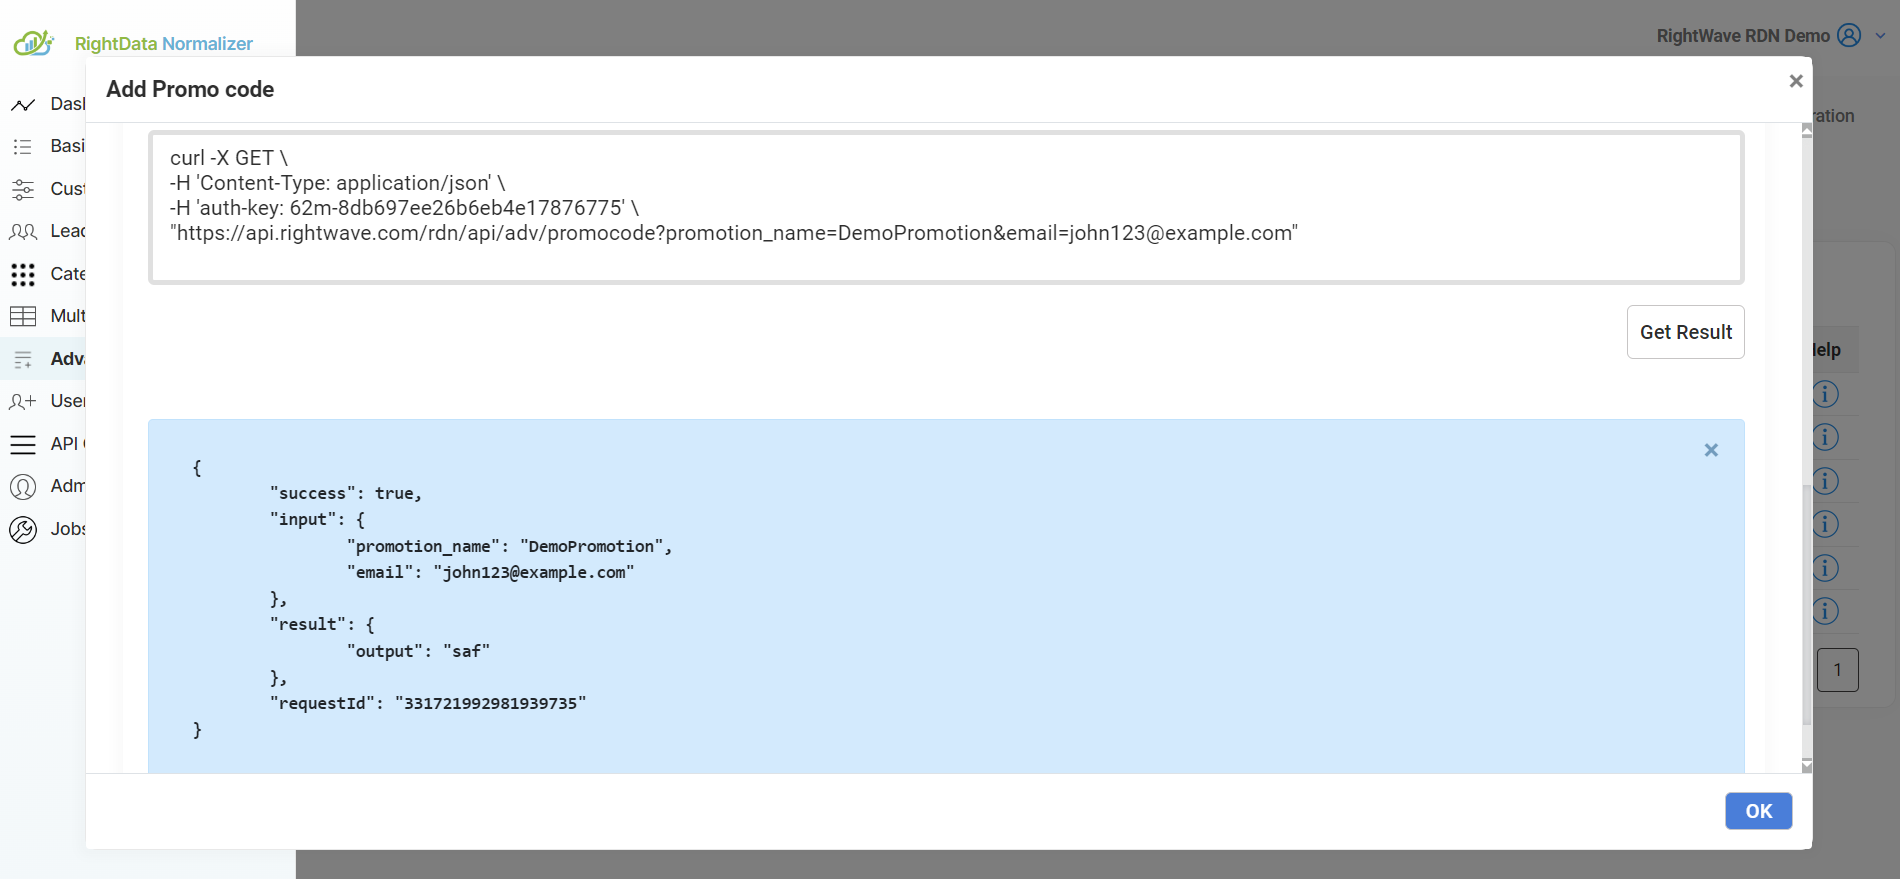
Example of Add Promo Code service call:
Suppose the company is providing Promo Codes to the first 500 users for an event, who have registered for the event through a web form. For such a scenario, users can utilize the Promo Code service of RDN by creating a Promo Code Lookup and adding the Promo Codes through CSV. For Example, Promo Code lookup gives the following URL:
Two below input parameters are required after the process of getting API string URL:
- promotion_name: Name of the Promotion.
- email: valid email id.
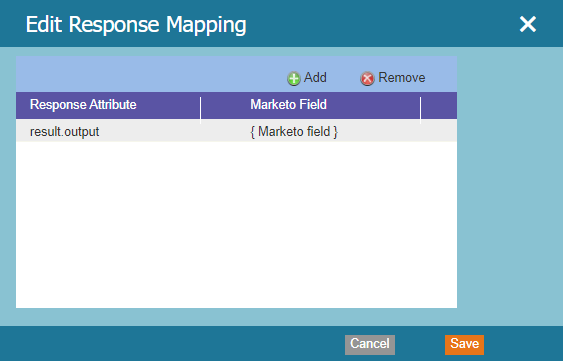
7. Please make sure to use the correct fields as input parameters and map the response of the service with the correct fields in the Marketo.
You can use this URL in Webhook which will be called after the user registration.
The API call will give a Promo Code in JSON form as below:
Output JSON : {“promocode”:”<promocode value>”}
You can map the Promo Code field with a Marketo field which you can further use in email to the registered user.
Steps to follow in Marketo:
Service Name: Add Promo Code
Service type: Advanced Service
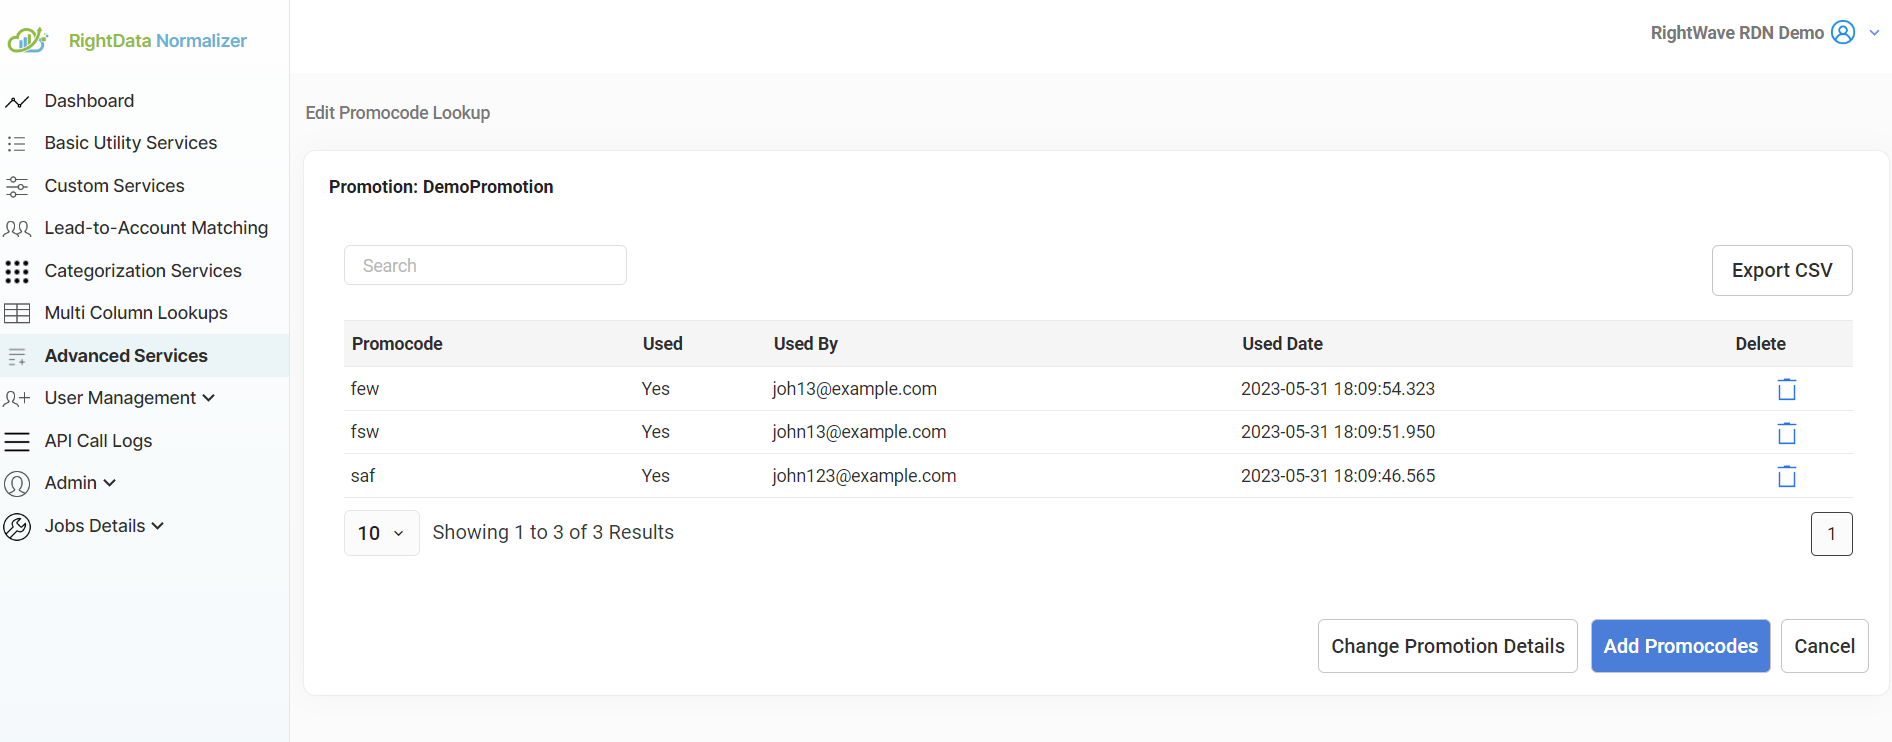
Service Description: The Promo Code service provides Promo Codes one by one to the right user from the list of Promo Codes uploaded in RDN for the respective event.
For Example, you have a list of 100 Promo Codes that you have uploaded in RDN. Now whenever the Webhook call will be made from Marketo, this service will provide one Promo Code for each Webhook call. Please note that if a Promo Code is assigned to a specific user then that Promo Code will be not available for any other user.
Please note that the request parameters values (in step 2) and Marketo Fields (in step 4) are just for example. You have to enter the values as per your service requirement.
Steps to configure service Add Promo Code in Marketo
1. Go to Admin and click Webhooks. Click New Webhook.
2. Name and configure your webhook for the Service Add Promo Code.
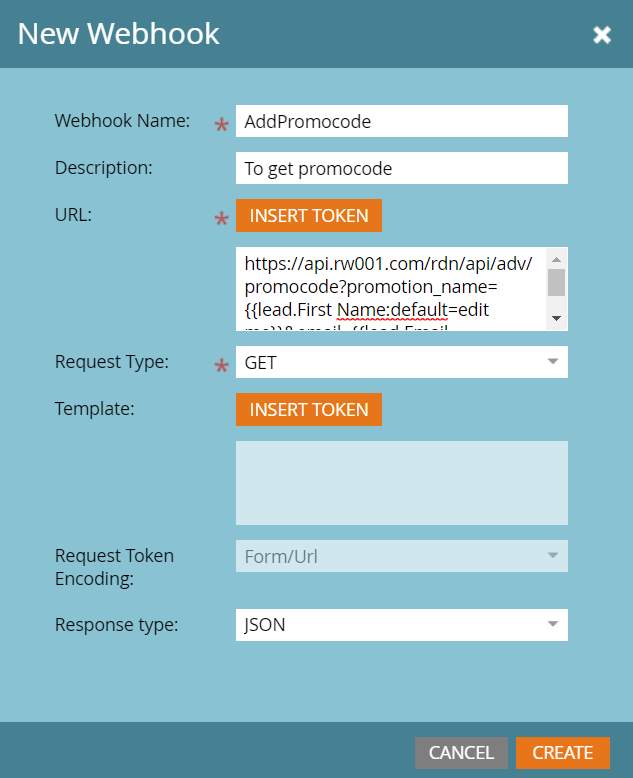
Webhook Name: Name of the webhook. In the above example, the Webhook name is the same as the Service name. Webhook name can be provided as per requirement.
URL: The URL of the Service Add Promo Code. The URL has domain and query parameters that will remain the same. You just have to change the parameter values with Marketo Token. To insert a token, click Insert Token.
Template: It will remain blank.
Request Token Encoding: It will remain None in case of POST, in case of GET field will be uneditable.
Response type: Select the response format as JSON.
Request Type: The Request Type will remain the same (i.e.) GET as given in the example.
- Add Authentication Header.
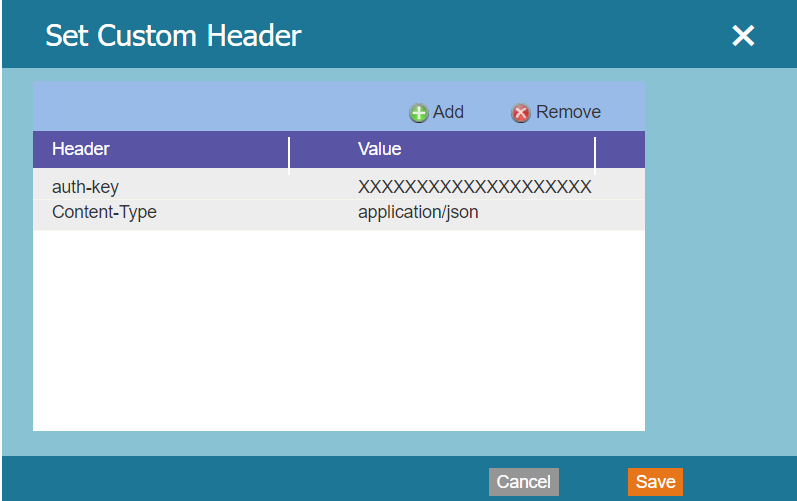
Please note that the auth-key shown above is the original auth-key. So, the same value of auth-key and Content-Type should be used while configuring Webhook as shown.
- Response Mappings: Response Mappings are created via a pairing of a Response Attribute. The Response attribute depends on the output you are returning from the Custom service JavaScript function. It is recommended to return JSON from the custom service so that you can easily map it with the Marketo field.